Hola pendejo's. Here's how I've mounted my own skis, and how you can too.
Items required to own/borrow:
Printer
Measuring Device
Center punch (nail and hammer can work fine)
#3 pozidrive screwdriver (this is a non-negotiable. Wing this shit anyway you want but please please PLEASE use a #3 pozidrive)
Drill
Drill bit (either 3.6mm or 4.1mm. If you're a dirtbag, I've used 5/32 (~3.97mm) bit in the past on topsheets with metal and it's worked fine)
Straight edge
Pen/pencil/penis
tape
glue
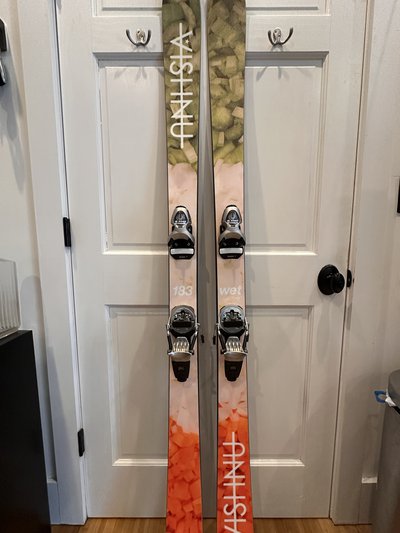
Skis
Boots
Bindings
Step 1. Find and print a template here. I only have experience with the pivot template - hold it up to your bindings to verify pattern is correct if you're unsure. https://www.bindingfreedom.com/paper-templates/
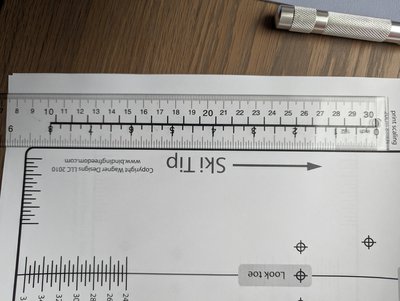
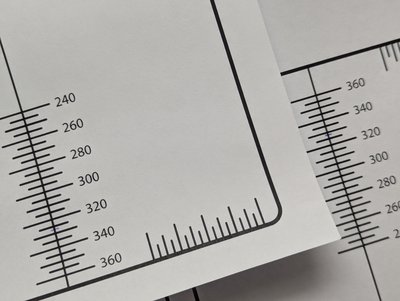
Step 2. VERIFY SCALING. You can see below where a fresh print was slightly undersized. It was approximately 1/16th an inch short at 7in. I scaled the print UP to 101% and found it to be spot on. THIS MAY NOT BE WHAT YOU NEED, YOU GOTTA VERIFY YOURSELF. MEASURE THRICE, FUCK IT UP ONCE
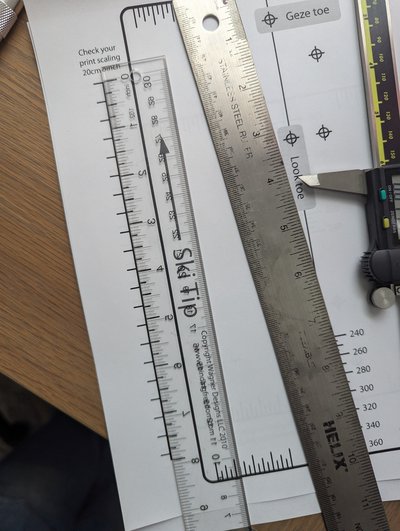
After Scaling:
Note: You can verify scaling and if the template is correct thru the holes in your binding as well
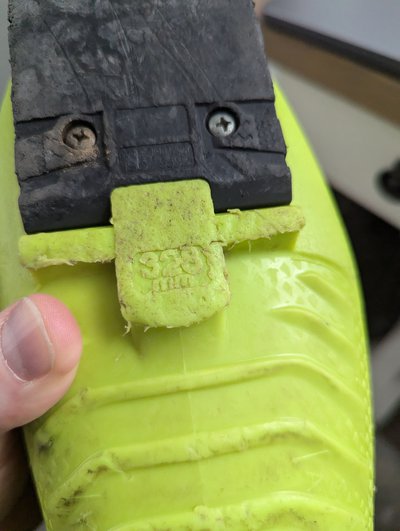
Step 3. Find your boot's BSL. This should be stamped on the shell on the sole. If you can't find it, some manufacturers should list it if you look up your make/model according to size.
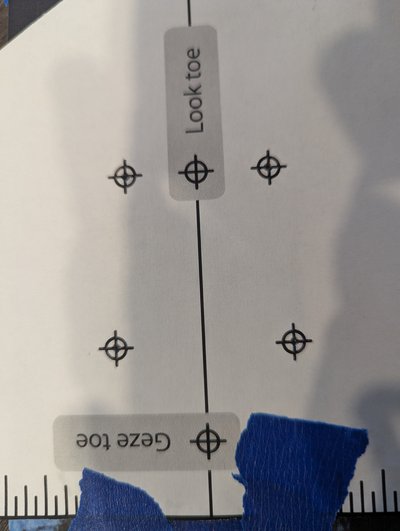
Step 4.20. Tape each toe and heel template sheet together at the fold you made. Make sure this is as straight and true as possible. A straight edge comes in clutch here. Also, be cognizant that this template is just paper and can 'bend', so verification of a straight edge is imperative. The edges are cut off here for the next step.
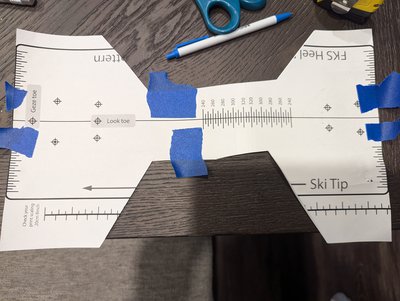
Step 4.2069. Mark the center of your ski. This ain't rocket surgery. I used a speed square at a known location on each side of the ski, marked a line and where the lines intersected is where the center of the ski is. You can also measure, split the difference, bada bing bada boom you got the center. if you need a ton of help on this it's probably best you don't mount your own skis tbh.
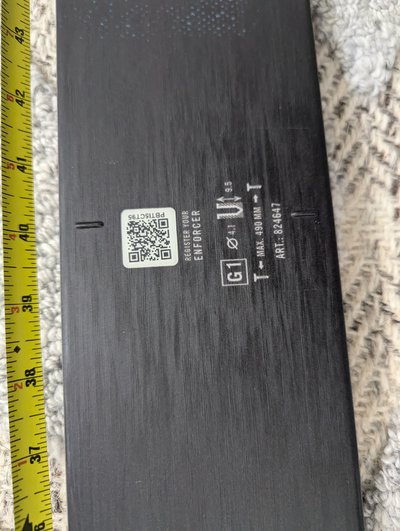
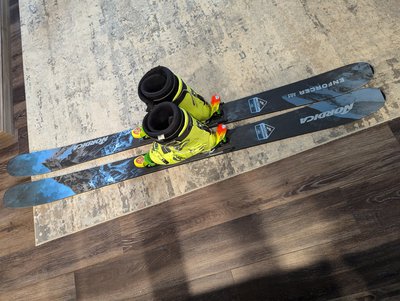
Step 5. You see those cut outs I made above? That's because the seam of the heel and toe template is the center of your boot! This is truly the genius of these templates. Line the template on the centerline of the ski, and the seam where you taped together the templates to the mount location you want. The cutouts on the side of the templates helped me see where the recommended mount line is to line it up with the taped seam. If you want to mount fwd or back of the rec line, now's your chance! Now is also a good time to verify the mount locations and drill bit type you need. It should be printed on the topsheet and it's also not a bad idea to make sure the mounts are what they say they are as the topsheet could shift during the pressing process. Nordica makes these lil nubs and it's super convenient.
Step 6. Once the template is taped onto the ski and straighter than bob ross, use a center punch on the hold crosshairs so the drill bit doesn't wander. I also take this time to place the bindings on the ski and get a sanity check that everything is in the right spot and I didn't fugg it up bad. Once the holes are punched, I like to take the template off and verify the centerpunch marks are straight and centered. This is the last chance to fix a fuckup before you start drillin, so get it right!
Step 6.9 (nice). Drill! I got a fancy bit that has a shoulder so you don't drill thru your base. In the past, I've used a regular drill bit and the tape method. The tape method sketches me out on a ski with metal in it because it takes a decent amount of pressure to punch thru the titanal and the tape ain't stoppin shit if the bit's got some momentum going down. If you do use tape to verify drill depth, be careful. Or drop the guap on the right bit it'll last you a lifetime. The drill bit size and depth will be on the topsheet of the skis.
Step 7. Consult newschoolers and leave feedback on @Biffbarf 's profile calling him lame when you accidentally'd your shit backwards because you didn't double/triple check everything
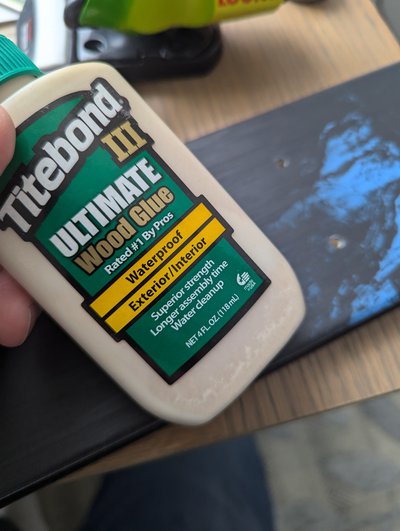
Step 9. Glue! But before that, shake the shavings out of the holes and cut away any topsheet flashing. I use this wood glue, some people use epoxy, my brofessional opinion is that it doesn't matter as long as it'll make the holes sealed off to moisture. Use a toothpick or something to get glue in the hole so surface tension doesn't leave a drop at the top
Step 9. Mount! On pivots, it is easiest to do the back screws on the heel first, then the front due to the pressure the brake spring puts on the base. Get the screws to German torque (Gudentite). They just need to be snug, you don't want to strip these bad larry's out gorilla fucking them in. Verify the bases of the bindings are flush with the top sheet and there's no air gap.
Step 10. Adjust! Another disclaimer: I'm about to lay out a ton of bro-science. If you're concerned in the least bit, take your shit to a shop where some goober will use special equipment that will make sure your shit's good to go. If you trust your knees in the hands of an internet stranger named biffbarf because you're too stubborn otherwise, keep reading.
Adjust your DINs. If you don't know what they should be at or how to do it, I advise not doing it yourself.
Adjust your fwd pressure:
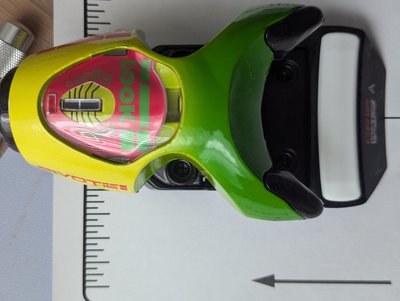
Pivots use 2 screws on the back to move the 'dildo' forward and back. This is what adjusts your fwd pressure. Look has a little white tab on the back of pivots that aligns with a molded line to tell you when your fwd pressure is set.
Click your boot in, and screw in the dildo screws little at a time (you'll feel a cam lock every 90 deg or 180 deg I don't remember) equally until the white tab hits the molded line. Between adjustments, remove the boot and rotate the heel to cycle the fwd pressure indicator.
NOW. Here's what I do that may or may not be the most kosher thing in the world when it comes to pivots. Sometimes, you can screw the dildo in a ton and not make much progress on the indicator. I keep screwing until when clicked in, there isn't a ton of lateral heel movement. Sometimes the boot can be loose-goosey in the binding side to side in the heel but the indicator can indicate 'adequate' fwd pressure. This is not my preference. Maybe someone with non-hackjob experience can chime in here. I adjust until excess play is taken up, then verify the fwd pressure indicator is still on the line. I am not comfortable taking the fwd pressure indicator tighter, or 'over' the indicator line. There is always some sidey-sidey play with pivots in my experience.
If you have literally any other alpine binding, you don't have to worry about that last step, there is usually just a screw in the back that either needs to be flush with the housing or there's an indicator that will be flush with a line similar to the pivots. Other bindings aren't as finicky due to the nature of the turntable pivot heel.
Step 11. Go rip! The 'oh shit did I do this right' feeling goes away after a couple days on the hill. If I can do it, and the stoned 22/44yr old at the ski shop can do it, maybe you can too. Hope this helps along the way.
-Biffbarf