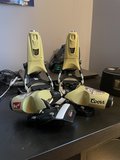
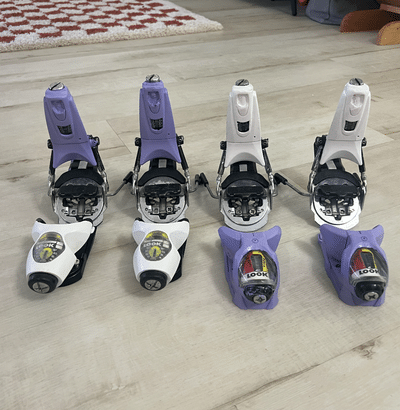
The FKS 18 starting canvas:
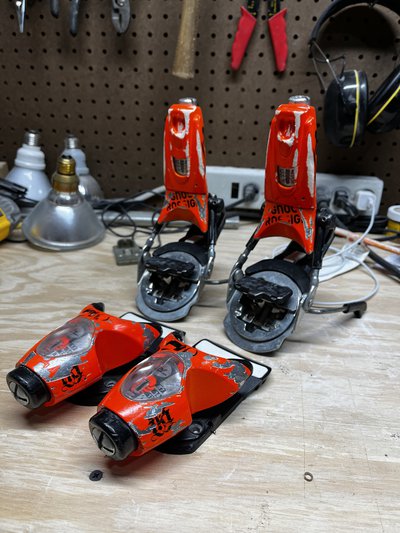
I began by removing the DIN windows, popping them out from the bottom with a flathead. Push inward and then out the top. Window paper will come out next. Then I unscrewed the DIN bolt from the toe fronts, with a #3 posi-drive screwdriver. The spring cap and spring will come out, lift the toe piece off the post. Keep track of all parts. Bolt, bolt cap, spring, black washer with the bump facing the back of the toe, then on the other side the square piece of metal with the fold at the top facing thehe back, the toe post, then the screw from the back.
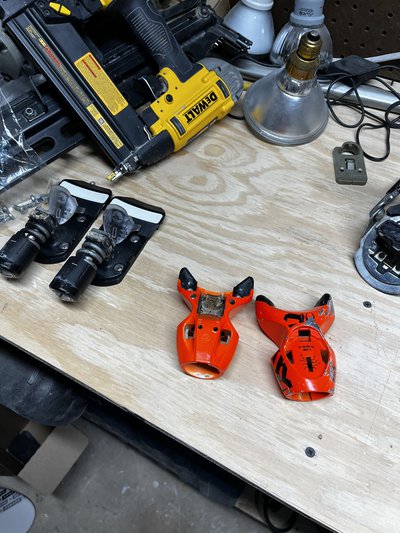
Then I removed the toe wings with a T-15 Torx bit from the underside of the wings. At the heel pieces, unscrew the heels from the baseplates where you would adjust forward pressure.
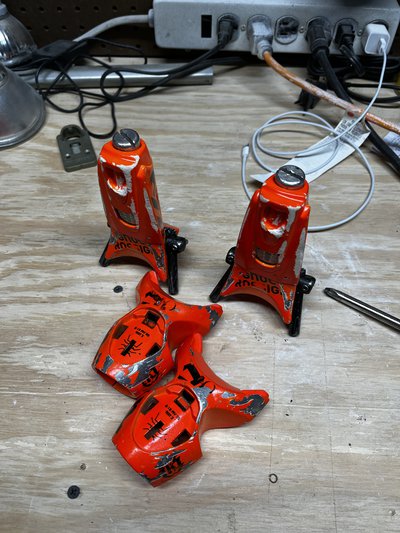
Here we are mostly taken apart, now we need to pull off the plastic heel caps. Unscrew the heel DIN bolt as much as you can. There will be a wall of resistance, where the bolt will begin to pull the plastic cap off. If you unscrew it hard enough, the DIN bolt with unthread from the inside of the heel, which gives you access to the spring if you want to regrease that.
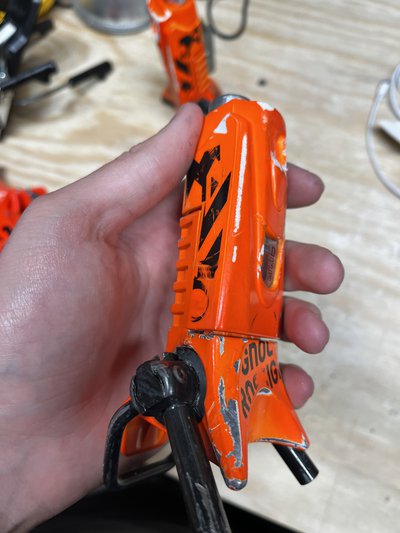
Heel cap is beginning to pull away. Heres the secret to getting this part off: on the lower right of the front of the heel cap, there is a little hole drilled into the plastic. There is a small metal pin that goes through that hole into the metal underneath. Begin to slide the edges of the plastic cap up the metal, there are two small catches along the side that they have to clear to be removed. YOU HAVE TO LIFT THE PLASTIC CAP OVER THE PIN IN THE FRONT TO MAKE THE CAP REMOVAL DOABLE! Once the caps are off, the DIN window just snaps out of the plastic. The DIN line is just a snap ring on the heel, pull this off gently.
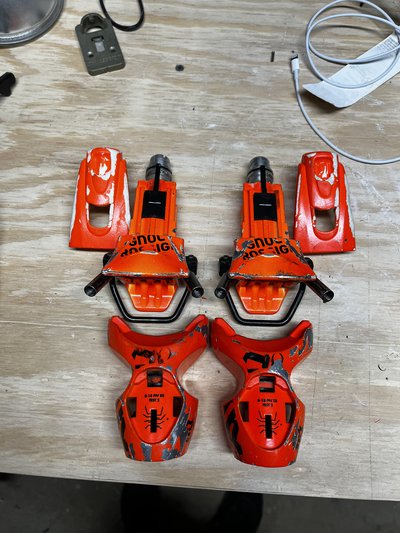
Once you've slid your caps off the heels, you're ready for paint prep. At this point, mask off your DIN lines on the toe pieces or trace them to repaint later.
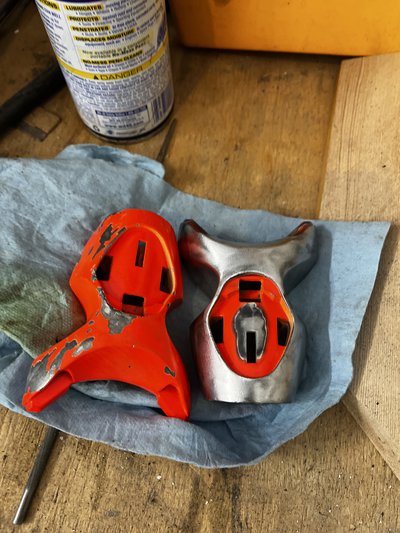
I began by using a bench grinder wire wheel to remove the orange powder coat on the metal pieces. Chemical strippers will not work on this material, it must be mechanically removed. Remove as much paint as you can, using a wire wheel or sand paper. Sand the plastic caps with a ~400 grit sand paper to give the paint something to grab. Fill in imperfections with epoxy or body filler.
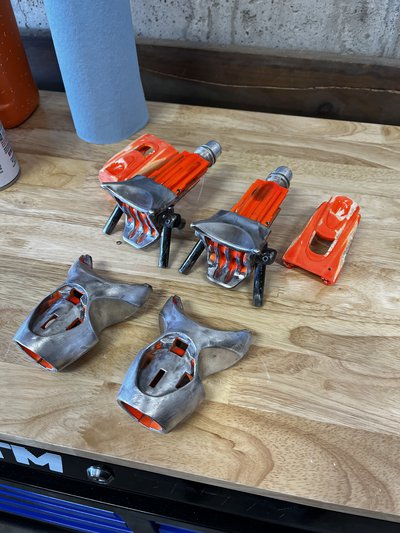
Once your pieces are stripped, clean them with alcohol or brake cleaner and get ready to mask. Since you can't remove the heel bar from the heel, you need to carefully mask around that joint.
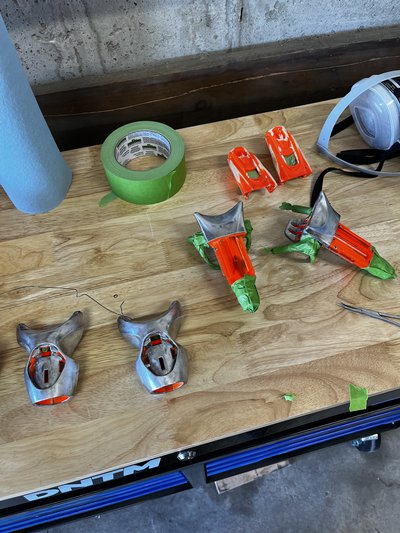
Use a quality painters tape to mask off your binding pieces. I masked the DIN screw on the heel, the heel bar and pivot area, inside the DIN windows of the heel caps, and inside the post area of the toes. Clean again and prep for paint.
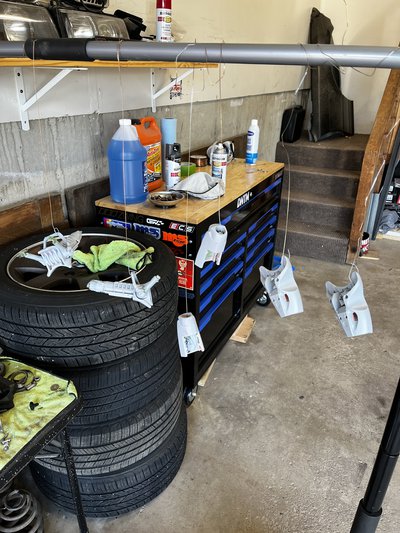
I hung my pieces in my garage to avoid wind and contaminants, and I used MIG wire and a ghetto stand with a car jack and a broom clamped to a shelf. I started with a couple coats of grey filler primer. After the last coat, I did a light sand with 400 grit paper.
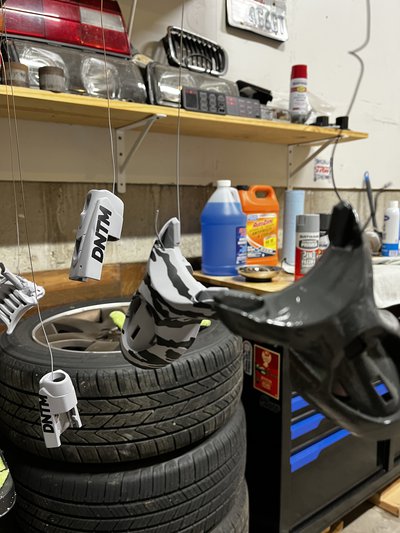
I wanted a tiger camo for these bindings, so I cut some vinyl to use a stenciling. Apply stencils if desired, and spray top coat. Sprayed three coats of gloss enamel as the color and left the paint to dry.
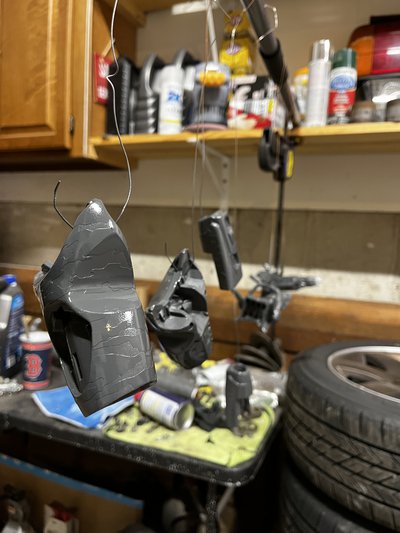
Drying paint. Don't get too excited and touch it, be patient and let the paint cure or else you will have to go back to square one.

Once the paint was cured, I pulled off the stencils. I sprayed on the enamel top coat a little too heavy, which drowned my vinyl stencils. This caused some rough edges and some of the paint peeled when I peeled the vinyl. Allow the paint to cure for longer than expected, and spray cleat coat. Most clear coats will dry/cure significantly faster than colors, so they can be handled in about a day. While the clear was curing....
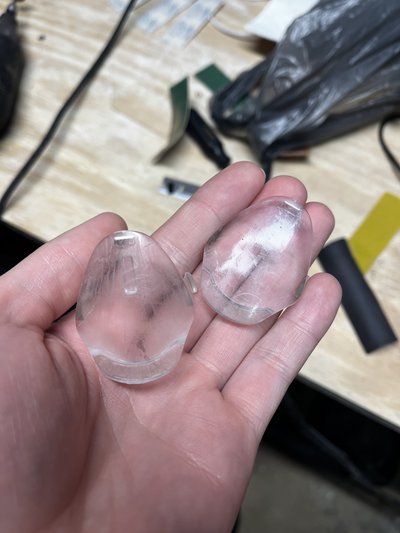
While I let those cure for a week, I refinished the DIN windows by sanding them with 400, 600, 1000, 2000, 3000 sandpaper and pads and then polished them with automotive polish and a microfiber towel. Removed the haze and some of the smaller scratches.
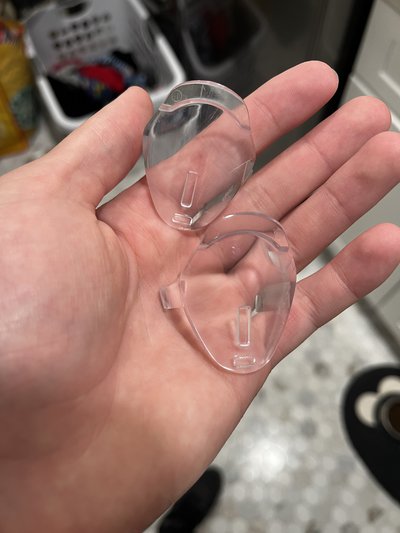
Final DIN windows after polishing.
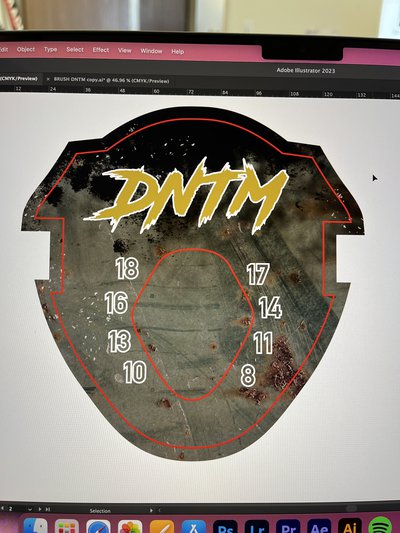
While waiting on curing paint, I whipped up some custom DIN inserts. Huge shoutout to Mike at Crasheur Customs, he got these made up for me and sent me a ton of stickers and swag. Check out his stuff at crasheurcustoms.com, he's got tons of custom windows already made and he can make you your own custom inserts like I did. Also lots of good inspiration for color schemes and ideas.
Once your pieces are cured and everything else is ready, begin the reassembly process by unmasking your work. I recommend re-greasing errythang, I used white lithium grease. Starting with the toes, I put the wings back on with the T-15 Torx screws. I regreased the internals, put the toes on the posts, tightened the DIN screw, then added the DIN windows by snapping them back into place.
With the heels, put the DIN line snap ring on the DIN screw, snap the DIN windows in the heel caps, slide the heel caps over the heels until they are snapped into place (replace the pin if you want, I didn't), and screw the heels into the turntables. Take a step back and enjoy your work.
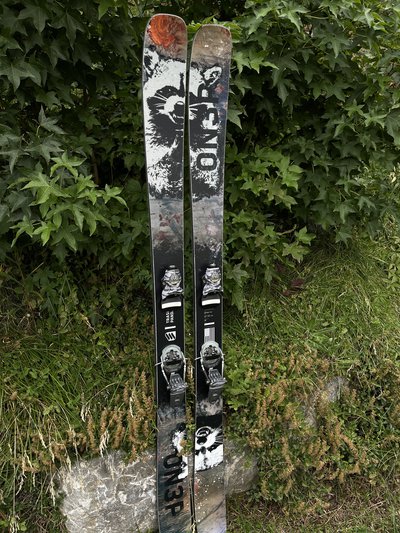
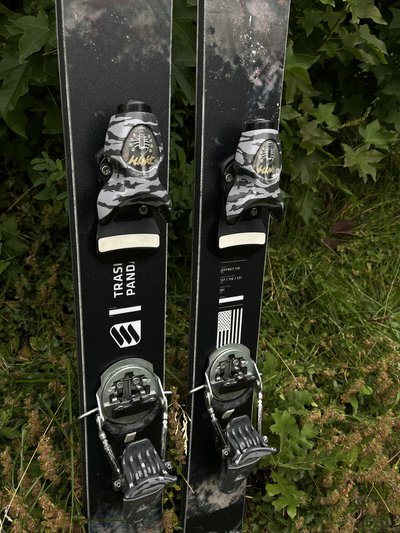
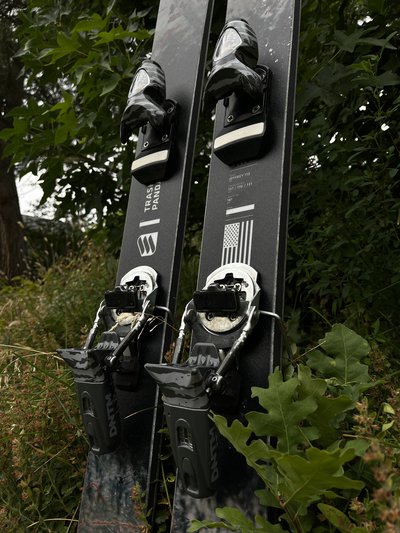
Heres my finished product:
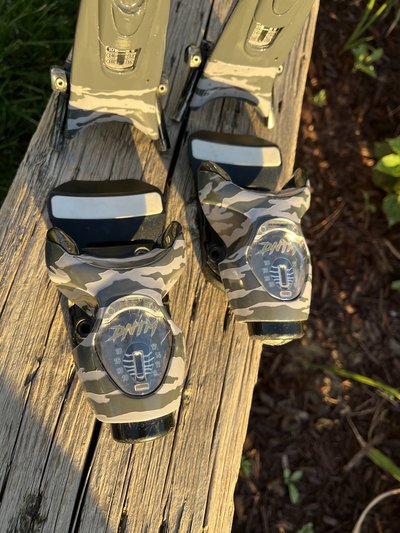
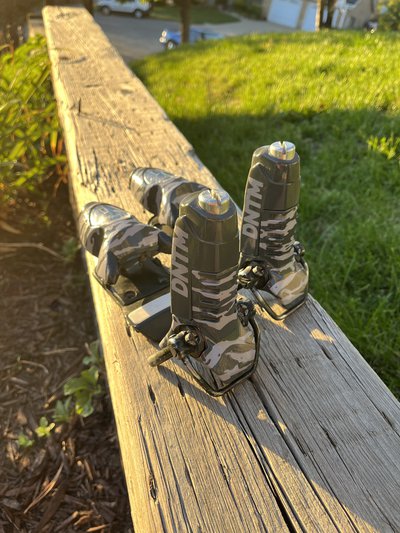
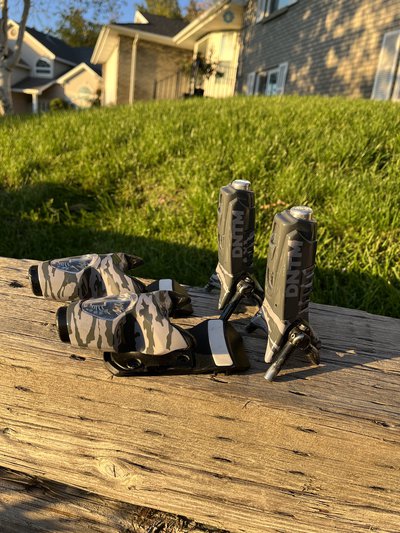
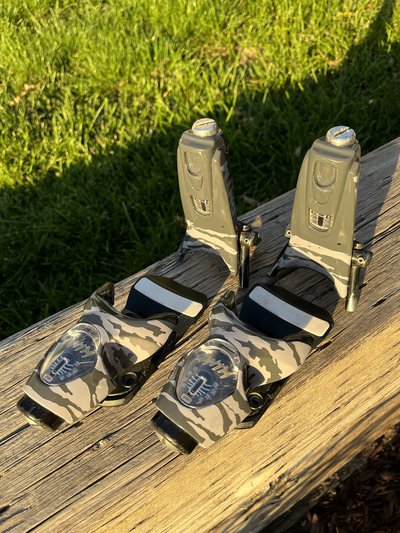
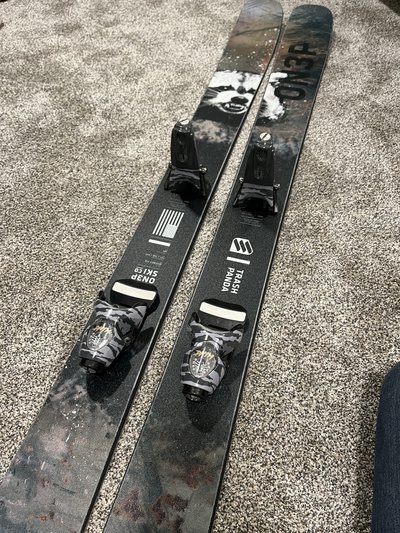
Designed these to go on the new Trash Pandas. The DIN window paper is actually the same texture as the ski if you look closely. Overall, I'm happy with the final product. I'm curious to see (and will update) how they hold up and function. It was a fun project to try out and Im stoked to have another custom piece to put on my custom skis. Shoutout to Mike at Crasheur for lots of help and tips and the custom DIN windows, Rustoleum for the paint, and my neighbors for inhaling all of my overspray. Let me know how ugly you think they are and how much of an idiot I am for wrecking a pair of flouro FKS. Happy to answer any questions.
-GrapeHunter


