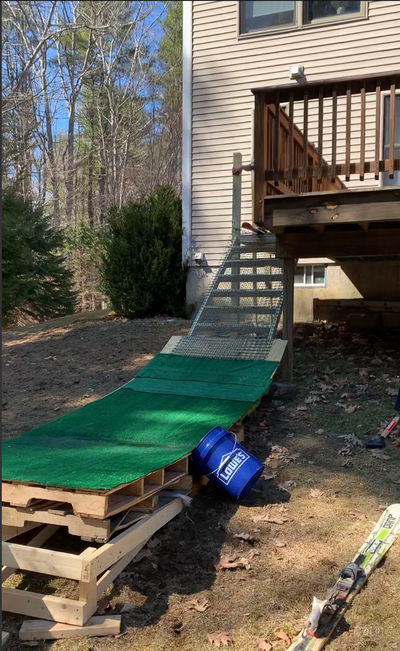
First things first you're gonna need a spot to put it. If you have a hill in your yard you should obviously try to incorporate it into the setup to give you some natural speed but it is definitely possible to build one on flat ground. You should keep in mind though that you will need a little more speed if the rails are on flat ground than if they are on a hill.
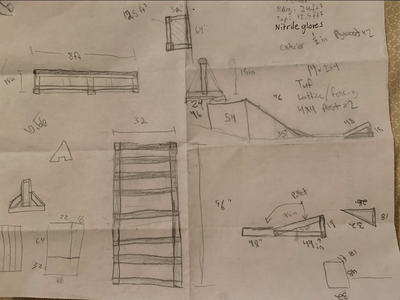
Now what about materials? For mine, I used 5 pallets, 6 8ft 2x4s, 2 sheets of 1/2in plywood, plastic fencing and 2 6ft x8ft artificial grass rugs. Pallets are easy to get for free, I just asked the people at home depot if they had any extras and they gave me them. Everything else I bought but in total the whole setup cost around $100-$200 (You can definitely build it for cheaper and smaller). Most important is to draw out what you are going to build before you go and buy stuff. Make sure you know everything you need and how much you need of it.
Here is my (very crude) plan of what it was going to look like
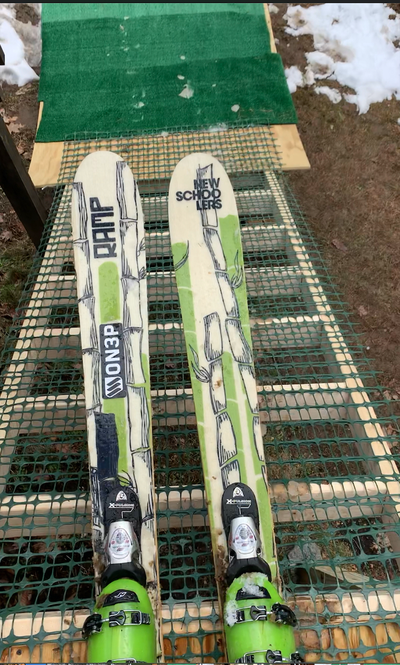
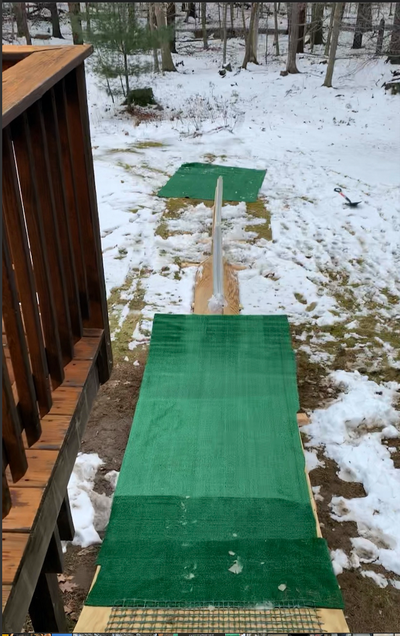
I built the drop in as a platform attached to our deck that was 54in off the ground and I find it gives plenty of speed with the drop in at around a 35 degree angle. For the drop in, I made a sort of ladder that I covered with plastic fencing. I've heard vinyl lattice works as well as the orange construction fencing. I used staples to attach the fencing to the ladder but only on the sides because then you aren't running over any when you ski it.
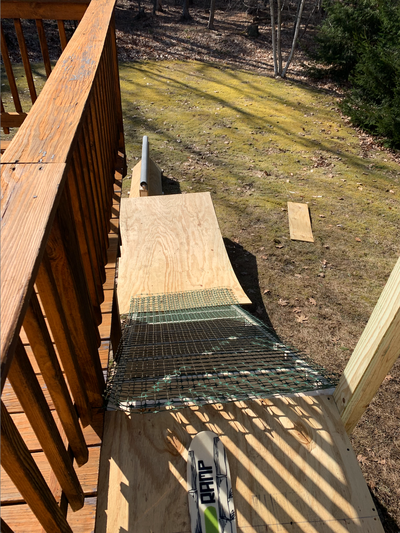
After the drop in I have a flat section that is 2 pallets long and 2 pallets high (optional, I just wanted a taller rail) that then went into the lip which was made out of 2x4s in the shape of a ramp with a pallet on top of it. I attached a piece of plywood a few inches up from the bottom of the drop in and the other side at the beginning of the lip. The most important part of maintaining your speed is a smooth transition so I only attached the plywood at each end so it would sag in the middle and flex when you got to the bottom. It is important not to make it too much of a gap because then the plywood will snap after a couple uses. I covered the plywood and lip in the artificial grass and used the other sheet of turf as the landing after the rails.
Here it is before the lip was put in. Where the green fencing ends is where the drop in ladder meets the pallet so thats how much overlap I have with the plywood
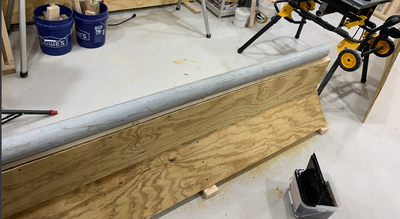
For the rails, I built 2 8ft long rails out of PVC pipe that I found at a construction site. My recommendation is to make a longer rail than you think because 8ft goes by quickly when you're sliding it. Building the rails are pretty straightforward, make sure you have a support every 16in or so and make sure there is support for the rail swaying side to side as well as forward and backward. You want the rail as solid as possible for getting tricks off of it. My rails are 18 in off the ground and have plywood covering both sides. This adds a ton of stability to it but is definitely optional. I would also recommend screwing from the bottom of a 2x4 into the bottom of the PVC and then attaching the legs to the 2x4. It makes the process go much easier than building everything and trying to fit the pipe on after.
All thats left is to shred it! Mine works with just water and if I need some extra speed for something I can throw a little dish soap onto the turf and it's perfect. So, since you have nothing better to do, go out and build one!


