So I've been cruising through this forum for a while, and I've come to the realization that everyone's methods for timelapsing seem to be different. So, I've come here to try and explain to you all what I believe is the best, most efficient, and pleasing method for timelapses.
You'll need:
- Intervalometer or Magic Lantern
- A camera, preferably with an M (manual) mode
- Tripod (You can also use a motion slider/timelapse slider or any other kind of device that will add 3 dimensional movement to your timelapse shots)
- Lightroom
- LRTimelapse (Free download here for now: http://lrtimelapse.com/ - I know he has plans for LRTimelapse 2 which with be a paid program, and for that reason, he may take away some of the abilities from the currently free version, so go download it ASAP before some features are removed)
- ExifTool (It's not going to be mentioned in this tutorial, but it's needed by LRTimelapse to successfully make the clips: http://owl.phy.queensu.ca/~phil/exiftool/)
- A Lot of Time
1. First, you're going to go outside and set up your shot, this is completely your choice as to where you're going to set it up. Keep the rule of thirds in mind with your shots. A lot of times you're going to want to shoot the sky in your shots, whether it be for clouds or for stars, but you want to avoid shooting JUST the sky, you'll want to throw some foreground into the shot in order to make the shot more interesting. So, you can choose to remember the rule of thirds and place the horizon line between the landscape and the sky on one of the thirds.
2. Before you're ready to start shooting the timelapse, make sure you've corrected the settings on your camera. If you're going to be shooting in the middle of the day, say from 12-2pm, and the lighting or weather aren't supposed to change much, you can shoot in manual mode because the scene will not change and thus every shot will be similarly exposed. Also, you're going to have to shoot manual if you're timelapsing the stars. However, if you're shooting a sunset or sunrise, or even in a situation where the lighting is going to change somewhat drastically, you'll want to shoot in a different setting. I shoot in P, which is kind of like "semi-auto" when I'm doing any lighting changing timelapses. Some of you might say, but if you're shooting in P, then you're going to get this nasty flicker as the camera stops the aperture down as the light dissipates, and, ah, yes, you're right, BUT, there's a solution, I'll address it later in this tutorial. Another setting you'll want to attend to in this step is the file type that you're using. I shoot pretty much all of my timelapses in the S1 file type, it's a JPEG file and it's 2592x1728, but it works just fine for any needs in post. If you're good with your camera settings, you wont need the extra workability that RAW files give you, so I recommend shooting JPEG. It saves you time in exporting because the files are much smaller AND you really don't need to take 5000 pixel wide photos for a video that you're probably just going to downsize to 1920 wide. The only time I will shoot in RAW is for night timelapses, because you will want to have that extra wiggle room for editing, you can really make the image pop and work well to make the stars stand out. Also, since star pictures are often 30 second exposures, you'll only last about 400 photos before the battery dies (based off of shooting with a t3i and only 1 battery), so RAW wont completely fill up the card before you're done with the timelapse. If you're clear with your settings, you can move on to the next step.
3. Okay, now you're officially good to go! You can take the timelapse with either an intervalometer, which you can purchase online for pretty cheap prices, or you can use Magic Lantern, which is the software that I use. Choosing an interval setting is completely up to you, but here's what I do. Oftentimes, I'll shoot in intervals of 2-4 seconds. You might think, wait, if you're shooting a timelapse for a few hours, you'll end up with thousands of photos, exporting a timelapse with so many individual images will be over 2 minutes long! And, yes, you're right. HOWEVER, you'll be able to slow it down VERY nicely without getting that nasty frame skipping. You can also speed ramp your clips for a dynamic speed look when you're editing in post (See example at bottom if you don't know what this means). Remember, you can ALWAYS speed stuff up and it will be smooth, but you can never slow stuff down (unless it was shot at a higher frame rate) and expect it to keep a the smooth look of traditional video. Trust me, the cost of more time and space because you have so many pictures is well worth the versatility of editing that you have in post.So, start the intervalometer!
4. Sweet, now you've officially shot the whole thing, and you've got a bunch of photos on your camera. Here's what you're going to do next. Stick your SD card into your computer with a card reader or just into the side, and create a folder on your desktop (or anywhere you'd like) and name it something relevant to the timelapse you just shot. So if you did a timelapse at, Turquoise Lake, let's say, you might title it "Turquoise Lake Timelapse". Then, drag all the files from your camera that will be used in the timelapse into the folder.
This is the start of the official editing process. Here's a video tutorial on how to use LRTimelapse and Lightroom, but I'll also write up the steps, too, because there are a few things that I do to make better timelapses that he does not mention in the video:

5. Okay, open up LRTimelapse, and in the right-side column navigate and find the folder that you've stored the pictures in. Click it to load it. LRTimelapse with load and ask you if you want to Initialize the XMP Metadata for the files. Click "Yes". Now LRTimelapse will create previews of each frame of the timelapse, it might take a while, so sit back or find something else to do for a little. Once it has all loaded, you want to keyframe as many photos as you want, I'd say keyframe whenever the scene changes and by default keyframe the first, last, and middle images. You can keyframe by clicking the little diamond to the left of the images in the list. Then, you'll click the "Save" button that's above the list of images in LRTimelapse. This saves the metadata so that you'll be able to edit them in Lightroom and they'll be compatible with LRTimelapse. Leave LRTimelapse open while you're in Lightroom.
6. Open Lightroom, and import the folder that you had created earlier. DON'T import from the card directly, it has to be from the same folder that the images were used in LRTimelapse. Once they are open, you'll notice that the images you keyframed all have 1 star, the rest have none. This is for easy editing, so you can click the Filter by Attribute > 1 Star in Lightroom and edit just the three images that are keyframed. However, before you do so, you'll want to do two things to EVERY image in the Develop Module. First, you're going to want to crop the image as you would like. Then, scroll down the settings in Develop mode until you find the Lens Corrections tab, and click it and select your lens. This will eliminate any warp distortion and vignetting (to a degree, but it is very good at what it does) so that the final images will look much better. Now, go back to the Library Module, and you can set the filter settings to Attribute > 1 Star. Now, go back to the Develop Module again, and proceed to edit each of the photos, you should have only about 3-6 photos that you edit here, most commonly only 3. Once you've edited each to your liking, you select all three in the bottom tray and right-click, then click Metadata > Save Metadata to Files. Leave Lightroom open.
7. Go back to LRTimelapse, click the "Reload" button that's next to the "Save" button. You'll notice that the images you originally keyframed and then edited in Lightroom will change to their recent edit. Now find the little button on the bottom that says "Auto" and looks like a curved graph. This will gradually change, more accurately, "ramp", the settings between the images that you have keyframed and edited. After you've clicked this, you'll want to check the box that says "deflicker", even if you shot in full manual and there isn't any flicker in the timelapse, it'll help smooth out the lighting and make it look really nice. This deflicker will also remove the flicker that you'll get from adjusting exposures that will have been apparent if you shot in P mode for a sunset or sunrise or light-changing shot. Once you've turned on the Auto and Deflicker buttons, you may click "Save" again.
8. Go back to Lightroom, and in the Library Module, remove the filter that was displaying only images with a 1 Star rating. Select ALL images, and right-click anywhere, go to Metadata > Read Metadata from Files. This will automatically read the ramped changes that LRTimelapse filled in for you. Wait for the images to completely load, and you'll have all of the images for the final timelapse. Go to the Slideshow Module in Lightroom, find one of the LRTimelapse presets (the video above goes over the installation of the presets, I believe, the site also mentions them), I most often use the LRTimelapse 30 frames per second preset. Then, find "Export Video", click it, make sure you're exporting in 1080p, and you can click Export. It'll take a while to export, a REALLY long time if you shot RAW, but when you're done, you'll get a nice .mp4 timelapse video!
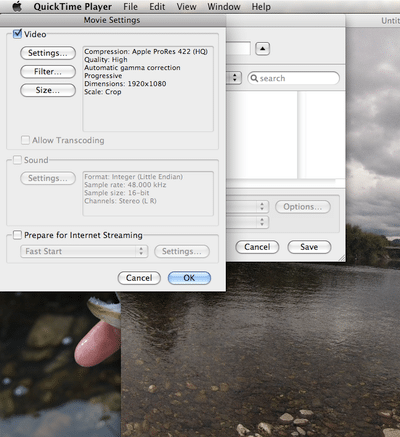
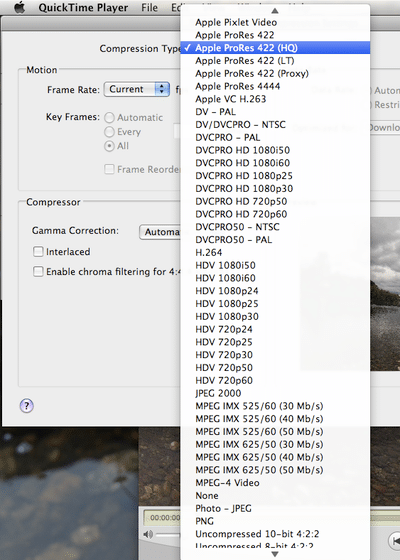
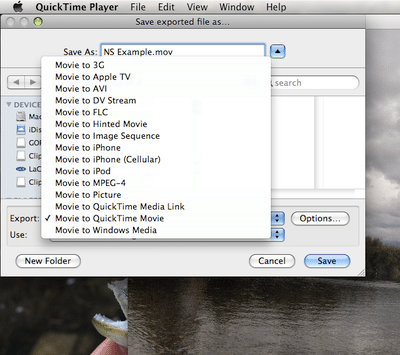
9. Open a program like MPEG Streamclip. Drag the file into the program, change the export settings so that you're exporting to Apple ProRes 422 (Or whatever else you want, but ProRes is great for FCP and, as people are now changing over, with Premiere). Make sure all other settings are correct, quality is at 100%, etc. and export the video from MPEG Streamclip.
10. BOOM! You're done, you've got a timelapse video that's completely ready to be added and edited in a timelapse edit/montage or just as filler in any other type of video!
Extra Notes: You can also change the cropping on each keyframe in step 6 so that you add a little movement in post. I didn't do this in the example, but it is completely at your disposal if you'd like to add some movement.
I might add more extra notes if I forgot any, but that should work!
Here's my timelapse reel from this summer, it was completely done using the above method!
Alright guys! I hope this was helpful to any timelapsers out there, feel free to ask questions, I'd recommend asking any questions in the comments so that if multiple people have the same question, they can refer to that.
Thanks!


