It looks like you are using an ad blocker. That's okay. Who doesn't? But without advertising revenue, we can't keep making this site awesome. Click the link below for instructions on disabling adblock.
Welcome to the Newschoolers forums! You may read the forums as a guest, however you must be a registered member to post.
Register to become a member today!
Official Ski Pressing/Shaping/Building/Constructing Thread
All of us have thought about building your own shit at one time or another, but how many of you actually have? This thread will be dedicated to those who actually build your own gear from scratch, surely there are some of you on NS. Now I can't contribute to this thread much because I've never built anything and I only have a small amount of time working with fiberglass, but would sure love to see some info from you dudes who actually do, whether you build in your basement, or for a living. So if you can legitimately contribute please do.
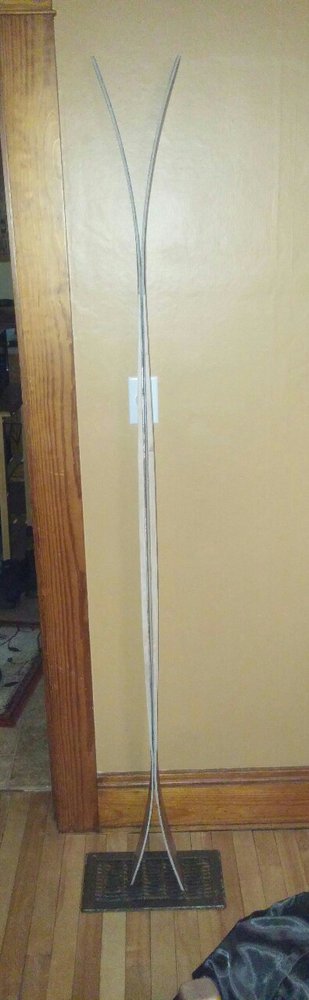
ANUSTARTThis summer I want to attempt to make my own pair. What would be the best way to get around the press. As a highschooler, I dont have a ton of cash. I feel like I could probably make my molds tho. Does anyone know where I could use a press in the Denver area?
Look into vacuum bagging. It won't be as uniform or consistent as a pneumatic press, but it will yield good enough result for a few pairs of skis.
I vacuum bagged all 8 pairs of mine and have yet to break any. Just done skimp on epoxy. There's a few custom euro companies that only use vac. Read up on skibuilders and joewoodworker on the process
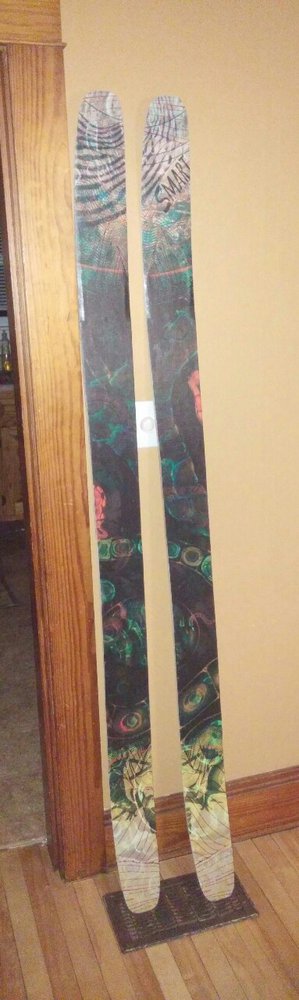
Just made these with a vacuum bagging system and they match up 100%.
Vacuuming bagging is a great way to go once you get it dialed in. The first pair I made were a mess, the bag didnt seal right at all, but learn from your mistakes.
Never understood why vacuuming bagging is looked down on. Planes and boats are made with bagging systems and if it is good enough for something 35,000 feet in the air it should be good enough for a pair of skis on your feet.
SmartNever understood why vacuuming bagging is looked down on. Planes and boats are made with bagging systems and if it is good enough for something 35,000 feet in the air it should be good enough for a pair of skis on your feet.
It's a pressure and resin evacuation issue. You're correct in saying many aerospace parts are vacuum molded. But they are molded in an autoclave at 100 psi. Vacuum molding is also a good way to go for 100% composite parts that are made using prepreg. Doing a wet layup at room temperature, you are going to need to use a good amount of excess epoxy to completely wet out your fabric in a timely manner. At the 13 psi you might be getting out of a garage vacuum bag set up, you're not going to squeeze out much of the extra epoxy. In composites, there is an ideal resin to fiber ratio and unnecessary resin is going to leave you with a heavier and weaker structure.
That being said, vacuum bagging is a completely fine method for the hobby builder. It's usually cheaper and easier to get into, will save some space in your garage or shop and can still produce some fine skis.
I'm not completely sold on a lack of resin evacuation. I mean sure, it's not going to be AS much as someone pressing at 35 psi in a press, but I feel I had a ton that pushed out into my flash and breather material, and what kind of difference are we talking between the two? So many people press at so many different pressures, I think personally it's a negligible difference when it comes to skis. Now do I agree that a press is a TON more efficient? Fuck yeah, and I'd love to have one.
loganimlachI'm not completely sold on a lack of resin evacuation. I mean sure, it's not going to be AS much as someone pressing at 35 psi in a press, but I feel I had a ton that pushed out into my flash and breather material, and what kind of difference are we talking between the two? So many people press at so many different pressures, I think personally it's a negligible difference when it comes to skis. Now do I agree that a press is a TON more efficient? Fuck yeah, and I'd love to have one.
Same here there is always a good amount of epoxy pushed out of the skis, also the vacuum pulls a lot of resin to it. Not sure if that's a good thing but I go with it.
I have been having a really difficult time making a powder ski profile using snowcad. I am trying to base it roughly off of the old Bibby Pro, but I am having no luck. Does anyone have any recommendations for making a powder ski profile on snowcad?
Btw, How do these measurements seem? I found them online but they seem really off:
Tip: 15mm rise/25cm from tip
Tail: 20mm rise/18cm from tail
Positive camber: 5mm
When plugging these measurements into snowcad they seem very flat, and the rocker does not seem large enough.
greeneI have been having a really difficult time making a powder ski profile using snowcad. I am trying to base it roughly off of the old Bibby Pro, but I am having no luck. Does anyone have any recommendations for making a powder ski profile on snowcad?
Btw, How do these measurements seem? I found them online but they seem really off:
Tip: 15mm rise/25cm from tip
Tail: 20mm rise/18cm from tail
Positive camber: 5mm
When plugging these measurements into snowcad they seem very flat, and the rocker does not seem large enough.
Any help is appreciated
thats because those are the rocker dimensions, not the tip and tail heights. your tip and tail heights should be anywhere from 60-80 mm after the rocker has concluded
loganimlachthats because those are the rocker dimensions, not the tip and tail heights. your tip and tail heights should be anywhere from 60-80 mm after the rocker has concluded
Thanks for the help guys. That makes sense that the dimensions refer to rocker. It looks like Ill have to play around with snocad some more.
So I finally have most of my materials, and I am beginning the building stage of the process. I have a few quick questions though. First off, is 1.5 pints of the entropy cpm/cpl epoxy enough for two layups, or should I get 3 pints?
Also, I am building a vacuum press and I am wondering about my design of the mold. I plan on building a solid unadjustable bottom mold out of mdf ribs that are spaced one inch apart. On top of the mdf ribs, I will fasten a sheet of 24 gauge sheet metal. The sheet metal will be screwed onto the mold around the very outside still leaving enough room for the vacuum and the skis within the outside area so that a vacuum will still be possible. There will also be wood glue or another adhesive on top of each mdf rib to attach the sheet metal in the middle area and i will use weights to make sure that the sheet metal has the correct profile of the mdf mold. The vacuum area for the press will be between the sheet metal and the vacuum bag. Do you think this will work? (sorry that was long)
if you're just going to do one layer of sheet metal make your mold solid, don't space your ribs 1" apart. That's the one thing i regret, is not just biting the bullet and making solid molds.
loganimlachif you're just going to do one layer of sheet metal make your mold solid, don't space your ribs 1" apart. That's the one thing i regret, is not just biting the bullet and making solid molds.
If I kept the ribs spaced 1 inch apart, what would you suggest I do for the material on top?
probably some type of hardboard or a plastic that isn't too affected by heat, then your metal on top of that. maybe even two layers of metal would be fine.
i just say this because I spaced my ribs out a couple inches and after i pulled the skis out of the vac you could def see where the ribs were and weren't. but maybe you'd be fine with 1", try it out and let us know how it goes.
I remember reading somewhere that you MUST have at least one layer of fiberglass between the base and the core. Is there a reason for this? I'm guessing the base material and core don't adhere well or something, but if you roughed up the core enough would it work?
Also would substituting layer of carbon fiber provide the same effect as the fiberglass?
PoikenzI remember reading somewhere that you MUST have at least one layer of fiberglass between the base and the core. Is there a reason for this? I'm guessing the base material and core don't adhere well or something, but if you roughed up the core enough would it work?
Also would substituting layer of carbon fiber provide the same effect as the fiberglass?
It does help with bonding, but it also helps with stiffness and the overall strength of the ski both directions. I haven't myself yet built a ski, but this is what I have been reading. A layer of carbon fiber would not have the same effect as fiberglass, but it would be comparable. I don't know much more because I have never even skied a ski with any carbon fiber in it.
I'm interested if anybody knows more about this too?
Probably already been said multiple times, but skilab.com is the shit. The guys are nice, I've bought all the shit I've ever needed from them, based out of PC now, awesome guys. I press skis with one of their buddies. Just a bunch of great guys and gals.
K.Breiteven if it is used to store steaks or salmon? ;)
Technically yes, right? But if it's super thin vinyl and the seal isn't super good then you're in for a bad time. I've seen people use anything that's sealable and can have a valve installed. Ninetyfour did something in a ziploc if I recall. If you can pull a decent vacuum then sure, why not?
Regarding resin evacuation... Does anybody use a wet out table or measure their ratios? So like x ml per sq meter of glass to give optimum strength/weight? Cause then a low pressure vac system wouldn't need to evacuate much resin. I'm sure companies have that all figured out to save resin and therefore money.
What resins are you guys using anyway/where are you getting them? I have surfboard resin, which seems to have a nice elastic character to it judging by the rather large dent I put in one of my boards and the lack of spiderweb cracking.
DrZoidbergTechnically yes, right? But if it's super thin vinyl and the seal isn't super good then you're in for a bad time. I've seen people use anything that's sealable and can have a valve installed. Ninetyfour did something in a ziploc if I recall. If you can pull a decent vacuum then sure, why not?
Regarding resin evacuation... Does anybody use a wet out table or measure their ratios? So like x ml per sq meter of glass to give optimum strength/weight? Cause then a low pressure vac system wouldn't need to evacuate much resin. I'm sure companies have that all figured out to save resin and therefore money.
What resins are you guys using anyway/where are you getting them? I have surfboard resin, which seems to have a nice elastic character to it judging by the rather large dent I put in one of my boards and the lack of spiderweb cracking.
Yeah pretty much anything that is thick and stretchy to an extent will work as a bag. I did and still use large ziploc bags for small parts, with paper towel air bleeders and it works out quite well. Honestly if I was forming something that I've done several times before and wanted a budget bag, heavy duty contractor garbage bags would totally be game for me. But legit bag material isn't all that expensive anyways.
As far as resin evacuation goes there's two ways I do it (skis would be different, if you've wet out your cloth and scraped them, then they should end up at a fair ratio in a vacuum bag). For both process I always measure out my resin to cloth ratio. For fiberglass I go 1:1 cloth-resin by weight, and for carbon I go 1:1.1 cloth-resin by weight. This helps a lot to create a part that isn't resin rich or resin starved, so just the right ratio.
Firstly you can use certain bag layers with a resin bleeder to soak up and excessive resin; definitely research this because there seems to be endless ways to construct a bag. This always makes for a nice smooth part and is preferable for really large parts.
The other way to do it is to lay your cloth down on a piece of vacuum bag that's slightly larger, pour your resin onto the centre of your cloth, then put another layer of vacuum bag on top, then use a dry spreader to push the resin around through the cloth. This is basically like a wet impregnation, with the layers of plastic on you can actually cut this fairly cleanly with very sharp scissors.
There's other ways to go about it to, but those are just the ones I use most.
As far as resin goes I buy my epoxy from Entropy. I love their stuff, they're easy to deal with, and it's quite cheap compared to West System. We have to buy all sorts of weird shit for work though, for both epoxies and polyester resins.
Entropy gets used in surfing. Nobody seems to use west that often. I have resin research. Do they use poly for skis? Old shapers and whoever can say what they want but i think poly sucks. Its brittle and almost always cracks upon damage. It smells and is toxic. Seems like epoxy would be way better for skis, cost aside of course.
DrZoidbergEntropy gets used in surfing. Nobody seems to use west that often. I have resin research. Do they use poly for skis? Old shapers and whoever can say what they want but i think poly sucks. Its brittle and almost always cracks upon damage. It smells and is toxic. Seems like epoxy would be way better for skis, cost aside of course.
It's because west is expensive and not the best for what it is. I've been told that a few guys use Aeropoxy- very flexible and predictable, and has a cool plane logo. I'm currently using MVS, because it is cheaper but it is still good and what I was recommended. My test turned out well, probably going to do a fully layup with it today or tomorrow, but other than that I can't say much since I haven't rode on it yet.
Hey, guys my first ski build is coming along nicely, but iv run into an issue, what epoxy do I use. I need a room temp epoxy that's somewhat cheap. Can anyone help me out?
Henry.VHey, guys my first ski build is coming along nicely, but iv run into an issue, what epoxy do I use. I need a room temp epoxy that's somewhat cheap. Can anyone help me out?
Most epoxies will run you about $100-150, if you are only making a single pair there might be a smaller size offering at around $50-60 but unfortunately cheap isn't the name of the game.
Find a local composites or plastics store and call them up or drop in, they know their stuff and can sort you out with exactly what you are looking for. With that said, I've heard good things about aeropoxy, mvs, and entropy (just the high heat stuff though). I've heard to avoid west if you can as it is overpriced for what you get, but it is probably the easiest to find.
Most epoxies are designed for a room temp cure (unless stated) at roughly 75 Fahrenheit (22 Celsius), the problem comes with needing the 40+ min pot life that comes with slower hardeners as they cause the full cure to take longer. Slower cures can take weeks if you drop below 60-50 (15-10 Celsius) so be careful.
Henry.VHey, guys my first ski build is coming along nicely, but iv run into an issue, what epoxy do I use. I need a room temp epoxy that's somewhat cheap. Can anyone help me out?
I use Entropy super sap CLR. Their CPM resin requires a heated cure, where CLR is good for room temperature. Haven't had an issue yet and it's quite a bit cheaper than West System.
NinetyFourI use Entropy super sap CLR. Their CPM resin requires a heated cure, where CLR is good for room temperature. Haven't had an issue yet and it's quite a bit cheaper than West System.
Thanks for the recommendation! I've heard a lo about Entropy and I think that the CLR is just what I need. I'll order the 48 oz kit as I'm only making one pair. As far as curing times go how long do you think they should sit?
Sorry for the double post, but I just remembered a question I had on hardeners. Do I want the slow hardener or the fast? How quickly does the fast hardener go?Thanks again for all of your help!
I let my skis sit for an entire 24 hours, I have had some cures at slightly cooler temps where I've pulled out maybe a few hours at most before then and I could peel the top sheet up on the flashing, but after 24 hours was up it was rock solid. I use the slow harder we as well, and mix about 3 cups through layup, if you do it in 1 big cup it can self catalyze the whole thing right there (maybe even light on fire).
jackdonovanthinking about building a vacuum, but worried about delams? could rivets stop this and what size would I need
I wouldnt worry about that if you use the epoxy correctly,mix ratio and curing time with the proper heat you should be fine. As for vacuum you want at least 3 CMF, go here to study up http://joewoodworker.com/veneering/visitorspress.htm
SmartI wouldnt worry about that if you use the epoxy correctly,mix ratio and curing time with the proper heat you should be fine. As for vacuum you want at least 3 CMF, go here to study up http://joewoodworker.com/veneering/visitorspress.htm
what would I use for heat? a heat blanket or heat gun?
So I've unsuccessfully made 3 pairs, 2 pairs are fine, but they aren't as perfect as I'd like. For the two that worked, even before doing the layup I noticed that the cores and the base material didn't line up 100% in one way or another on 2 (out of 4) of them. I know that my jigs are perfect, but after I cut one one and try to line it back up there is a 1-2 mm shift. I'm not sure if it is because the material wasn't flat or something but it was on a table when I clamped down to it and I used ninetyfour's knife method to cut it out. I'm not sure what you guys are doing but clearly I'm doing something wrong here. Everything would be a hell of a lot easier if I could get super wide edges and just grind them down as needed.
Any advice other than practice? Base material isn't really something I wish to waste.
I've had some troubles with my bases warping to and it's more pronounced when using a knife cut, although I've had it happen with router cuts to. The best measures you can take against it are:
-Cut out a length of base material and allowing it to lay flat for 24H before cutting.
-Before you cut your bases out of this sheet, splice the sheet lengthwise down the middle. This one helps a lot, after you make the cut the two pieces usually don't butt together down the cut anymore and they usually bend away at the ends.
-Cut your bases out really close to layup time, as different temperature conditions between days can affect your bases.
-Clamp your base and BOTH edges all onto your template before gluing so that the base is forced true to the template shape. I've pulled some severely warped bases back into alignment no problem with this method. Once the edges are glued the base is waaay less likely to warp again.
This is how you wanna set your edge, base, and template up before gluing:
NinetyFourI've had some troubles with my bases warping to and it's more pronounced when using a knife cut, although I've had it happen with router cuts to. The best measures you can take against it are:
-Cut out a length of base material and allowing it to lay flat for 24H before cutting.
-Before you cut your bases out of this sheet, splice the sheet lengthwise down the middle. This one helps a lot, after you make the cut the two pieces usually don't butt together down the cut anymore and they usually bend away at the ends.
-Cut your bases out really close to layup time, as different temperature conditions between days can affect your bases.
I was thinking a router would be a better bet, but the knife is so quiet and clean. I didn't flatten out the material before so that might have been part of the problem. I left them cut for about a week, but I did check them directly after cutting and before layup and saw no visible change (guess I'm lucky). I'll have to make a note of this though and try to remember to change things up next time I build. I wanted full wood sidewalls, but I guess I'm going for partial wood and epoxy sidewalls now.
SmartJust made these with a vacuum bagging system and they match up 100%.
Vacuuming bagging is a great way to go once you get it dialed in. The first pair I made were a mess, the bag didnt seal right at all, but learn from your mistakes.
Never understood why vacuuming bagging is looked down on. Planes and boats are made with bagging systems and if it is good enough for something 35,000 feet in the air it should be good enough for a pair of skis on your feet.
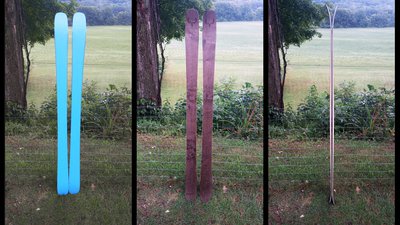
Damn that is one sweet graphic you got going on there!
SmartNever understood why vacuuming bagging is looked down on. Planes and boats are made with bagging systems and if it is good enough for something 35,000 feet in the air it should be good enough for a pair of skis on your feet.
I feel bad about the waste, the rubber tape, peel ply and breather cloth that only lasts a couple pairs. Not only that but if you have a press it seems quicker and less of a hassle to get a pair in if you are rushing against time. Cloth is cheap but it is still a pain to buy, cut, store, and dispose of.
More pressure equals less epoxy in the final product which results in a lighter ski. Not sure if anyone has done a direct comparison though. Maybe someone with a press should do a pair at 14 psi and weigh the two sets to see what the difference actually is.
PoikenzSo I've unsuccessfully made 3 pairs, 2 pairs are fine, but they aren't as perfect as I'd like. For the two that worked, even before doing the layup I noticed that the cores and the base material didn't line up 100% in one way or another on 2 (out of 4) of them. I know that my jigs are perfect, but after I cut one one and try to line it back up there is a 1-2 mm shift. I'm not sure if it is because the material wasn't flat or something but it was on a table when I clamped down to it and I used ninetyfour's knife method to cut it out. I'm not sure what you guys are doing but clearly I'm doing something wrong here. Everything would be a hell of a lot easier if I could get super wide edges and just grind them down as needed.
Any advice other than practice? Base material isn't really something I wish to waste.
for me I cut my base material on a cnc router as close to laying up as possible. then glue the edges on both at the same time just clamped to a plank and havent noticed any warping in the material since I moved to glueing both edges at the same time. for fixing to the bed of the cnc i use double sided carpet tape rather than risk stretching the material by screwing or it moving while cutting.
As for my core I do full wood core and hard wood sidewalls which are overwidth and not cut to the sidecut. for my lay-up my laminate is all overwidth and not to the curves of the ski. to stop any gaps or misalignment issues in the press. so the base material is the only thing to shape and I then cut out the laminate plank with the rocker profile once cured so the base material+edges determine the final shape rather than trying to align all the layers in the press. Its a little rustic with regard to the sidewalls being changable width along the sidecut but it works for me.
if anybody's interested in my builds i'm fairly dominating the #diyskis on instagram recently and happy to answer questions or take on criticism/advice on the way i'm doing things
razors-chazAs for my core I do full wood core and hard wood sidewalls which are overwidth and not cut to the sidecut. for my lay-up
I was thinking about doing this, but then I realized that it doesn't really matter if you are rabbeting your cores as any misalignment will still mean either a high base or edge. So are you not cutting out your cores to accommodate your edge teeth?
PoikenzI was thinking about doing this, but then I realized that it doesn't really matter if you are rabbeting your cores as any misalignment will still mean either a high base or edge. So are you not cutting out your cores to accommodate your edge teeth?
nah, when the edge teeth are 0.6mm thick like mine which equates to less than a degree angle across the ski width which can easily be countered by the epoxy and fibreglass across the ski in the lay-up
. yeah i could but the ease of which it could move out of line negates the effort required to rebate the edges of the core. I've bigger concerns like getting a properly pressed laminate given previous difficulties i've had with getting a good seal on the vacuum and have been trying to improve my pattern lasering on my veneer topsheet.
razors-chaznah, when the edge teeth are 0.6mm thick like mine which equates to less than a degree angle across the ski width which can easily be countered by the epoxy and fibreglass across the ski in the lay-up
. yeah i could but the ease of which it could move out of line negates the effort required to rebate the edges of the core. I've bigger concerns like getting a properly pressed laminate given previous difficulties i've had with getting a good seal on the vacuum and have been trying to improve my pattern lasering on my veneer topsheet.
tape seems most important, but I assume you already use the thick gum/ rubber type stuff. I haven't had leak issues and have been getting around 27 inhg pressing to a sheet of aluminum If you have any wrinkles in the bag you can just stretch and push it into the tape and I find it eliminates any sort of leak. On my first pair I found that the wood tips didn't fully push down (could be because I took too long to layup), so now I just put 50lb bags of water softener salt on each end just to be safe and haven't had a problem.
Poikenztape seems most important, but I assume you already use the thick gum/ rubber type stuff. I haven't had leak issues and have been getting around 27 inhg pressing to a sheet of aluminum If you have any wrinkles in the bag you can just stretch and push it into the tape and I find it eliminates any sort of leak. On my first pair I found that the wood tips didn't fully push down (could be because I took too long to layup), so now I just put 50lb bags of water softener salt on each end just to be safe and haven't had a problem.
Yeah i've a low temp vac bag specific sealant tape. the difference i've had between my two most recent presses is ridiculous. I built a new mould for building park skis and used a aluminium lining sheet for the mould rather than a diy-sealed ply board which i had ended up putting nail holes through for blocks to minimise core shift etc. I also did my tape in a single piece rather than the multiple pieces i used before, eliminating all but a single joint to close the loop which i did as a side by side lap joint rather than a butt joint in the tape. Also for the first time I used a breather material to help get rid of any air bubbles across the bag. all this combined meant my deflated in seconds and used hardly any vac pump oil meaning i must have got a solid seal on the bag.
my new problem and concern is the interface between my tip spacers and the core in that where i get my materials from roll the tip spacer up for sending and so its difficult to align the spacers with the core for me and due to the shape of the tongues i put on the core into the spacers are proving difficult to cut accurately.
razors-chazYeah i've a low temp vac bag specific sealant tape. the difference i've had between my two most recent presses is ridiculous. I built a new mould for building park skis and used a aluminium lining sheet for the mould rather than a diy-sealed ply board which i had ended up putting nail holes through for blocks to minimise core shift etc. I also did my tape in a single piece rather than the multiple pieces i used before, eliminating all but a single joint to close the loop which i did as a side by side lap joint rather than a butt joint in the tape. Also for the first time I used a breather material to help get rid of any air bubbles across the bag. all this combined meant my deflated in seconds and used hardly any vac pump oil meaning i must have got a solid seal on the bag.
my new problem and concern is the interface between my tip spacers and the core in that where i get my materials from roll the tip spacer up for sending and so its difficult to align the spacers with the core for me and due to the shape of the tongues i put on the core into the spacers are proving difficult to cut accurately.
try pre cutting oversized squares of your tip spacer material then letting them sit flat under weight for like a week, kind of like pressing leaves into a book. that should get rid of any curvature.
find some hard setting gasket goo and put a glob over your nail hole before putting the nail in. I don't know if you're reusing the vacuum seal tape, but i've found if i try to use it more than once my seal is fucked. it's got to be flecks of dust and shit at a microscopic level because you can't even hunt down the leak.
**This post was edited on Sep 18th 2015 at 10:08:57am
loganimlachtry pre cutting oversized squares of your tip spacer material then letting them sit flat under weight for like a week, kind of like pressing leaves into a book. that should get rid of any curvature.
find some hard setting gasket goo and put a glob over your nail hole before putting the nail in. I don't know if you're reusing the vacuum seal tape, but i've found if i try to use it more than once my seal is fucked. it's got to be flecks of dust and shit at a microscopic level because you can't even hunt down the leak.
**This post was edited on Sep 18th 2015 at 10:08:57am
I think i@m just going to ask the supplier not to roll it up in the box given i usually buy it at the same time as a bunch of stuff so the box is easily big enough for it to go in flat-ish. I had them weighted flat for some time before using them so it was flatter than usual (acctually almost to my rocker profile) but it was the coordination of the only slightly pre-bent core tongues which was difficult.
As for the nail holes in the ply i'm moving to using aluminium on all my moulds as i am having to redesign my moulds anyway for pressing different lengths of skis in them anyway so the ply is out the window now and my core shift blocks are gorilla taped to the aluminium in a temp way rather than punture the sheet, which seems to have worked in my last pressing.
As for vacuum seal tape and vac bag my bag is ~$2/m^2 and the tape is ~$8 for 15m so i have no qualms in replacing both between lay-ups when a good seal can make or break the lay-up. plus the tape is usually a mess once i've opened up the bag.
You just roll the end of the bag around a pvc pipe. Maybe that'll help?
I don't vac bag skis, but I've reused my sealing tape. I had this piece of waxy paper stuff that I put over the tape while the bag was open, to prevent the tape from being contaminated during loading or when it's not being used. Then you pull that off as you seal it and put it somewhere clean, like in a plastic bag.