It looks like you are using an ad blocker. That's okay. Who doesn't? But without advertising revenue, we can't keep making this site awesome. Click the link below for instructions on disabling adblock.
Welcome to the Newschoolers forums! You may read the forums as a guest, however you must be a registered member to post.
Register to become a member today!
Official Ski Pressing/Shaping/Building/Constructing Thread
All of us have thought about building your own shit at one time or another, but how many of you actually have? This thread will be dedicated to those who actually build your own gear from scratch, surely there are some of you on NS. Now I can't contribute to this thread much because I've never built anything and I only have a small amount of time working with fiberglass, but would sure love to see some info from you dudes who actually do, whether you build in your basement, or for a living. So if you can legitimately contribute please do.
Are you using tipspacers? Or a full length core?
Normally there is no need to do anything as the tips radius is taken by the spacer. If you don't use them you may want to use some steam and prebend. If you are worried about rocker rise (not the actual tips) don't worry the core will bend without issues.
Question, I designed a couple pairs of skis in autocad but how do I print the design in pieces so I can then connect them all together. I'm not sure if my printer is capable of doing this or Maybe I'm just doing something wrong. Thanks a lot
joelskido you guys do anything to bend the cores before pressing just looking at my press i feal like the wood will snap
pre bending the core is something i looked into, i was worried about the pressure i was going to be able to get with the vacuum and that being enough to bend the core to my fairly wild rocker profile. I was using a full core without spacers. I pre bent mine with a heat gun, no need for steam. my major concern was getting the core into the lowest point of the mould due to the thickness of the core. one i pre bent more than the other and found that it went to the mould shape better during pressing and there was less relaxation after curing. they weren't massively different but looking closely you could see it.
momentzQuestion, I designed a couple pairs of skis in autocad but how do I print the design in pieces so I can then connect them all together. I'm not sure if my printer is capable of doing this or Maybe I'm just doing something wrong. Thanks a lot
create 8"x11" rectangles over your profile and then set your print area to each rectangle at a 1:1 scale ratio
IlTeoAre you using tipspacers? Or a full length core?
Normally there is no need to do anything as the tips radius is taken by the spacer. If you don't use them you may want to use some steam and prebend. If you are worried about rocker rise (not the actual tips) don't worry the core will bend without issues.
razors-chazpre bending the core is something i looked into, i was worried about the pressure i was going to be able to get with the vacuum and that being enough to bend the core to my fairly wild rocker profile. I was using a full core without spacers. I pre bent mine with a heat gun, no need for steam. my major concern was getting the core into the lowest point of the mould due to the thickness of the core. one i pre bent more than the other and found that it went to the mould shape better during pressing and there was less relaxation after curing. they weren't massively different but looking closely you could see it.
yes i am using tip spacers but my rocker profile is pretty crazy. i am using a pneumatic so i am not worried about the core not taking shape but more about it snapping.
If the core snaps it's probably way too tight of a radius to belong in a ski anyways, so I wouldn't worry about it. I've hand-flexed some test pine cores as well to some pretty heavy deflections without any snapping or damage so I'm sure your cores will conform to your profile just fine. And besides, Surface gets away with this:
And they get away with it, without any prebends or any weird manufacturing processes as far as I know.
IlTeoI've always been doubtfull about that "polygonal" rocker. Someone here have ideas on the purpose of that shape?
its fluid mechanics. the flat plane of the rocker stages creates more drag as it cuts the line in the snow but this drag is transferred into upward force (float). Technically a continuous rocker ski should sit lower due to a decreased amount of float comparatively but would travel faster due to the comparative decrease in drag which would in turn create more float (hence why its easier to ski deep snow faster) so in the grand scheme its about the same whether you go 3 stage or continuous but 3 stage is better for pow at slower speed i.e. in trees but a continuous is better for higher speed pow skiing i.e. steeps. Or that was the understanding i have of it.
razors-chazits fluid mechanics. the flat plane of the rocker stages creates more drag as it cuts the line in the snow but this drag is transferred into upward force (float). Technically a continuous rocker ski should sit lower due to a decreased amount of float comparatively but would travel faster due to the comparative decrease in drag which would in turn create more float (hence why its easier to ski deep snow faster) so in the grand scheme its about the same whether you go 3 stage or continuous but 3 stage is better for pow at slower speed i.e. in trees but a continuous is better for higher speed pow skiing i.e. steeps. Or that was the understanding i have of it.
I understand your point on fluidodynamic, but from what I remember it's not the drag force that induce lift, it's the opposite it's the lift force that induces drag. And here's my point in a profile in a fluid you need an uniform difference of pressure to generate a good lift force, a abrupt profile would concentrate the forces in the lowest point of the curve not giving a good distribution of forces. (sorry for the simplistics term but if we start talking about turbolence, Reynolds numbers, and so on we'll never get out of it)
WiscoSkiingcan you make a video of tapering the cores with the plane?
Not going to be using the planner to taper the cores. Checked out a router table system a while ago and I found it to be easier to set up for different heights and lengths. There will be a video of that. I'm kind of making little edits of each step along the way.
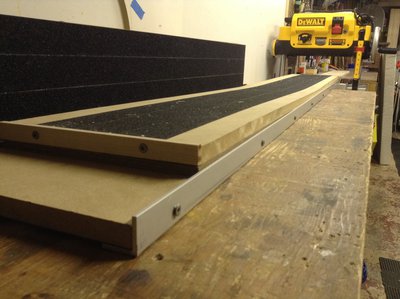
It's made to do one core at a time. Stiffened it with aluminium rails, although they're unnecessary with my new planer setup (that DW735 in the background, aweeee yissss). Basically its two 5/8th" MDF sheets stacked and screwed in the middle, then I use masonite shims in between the two to set my profile.
SteveIrwinIve never really used a planer before but i could have access to one. How do u get the core to stay pressed in the crib while planing it?
NinetyFourThe feed rollers that sit infront of and behind the planer head compress the core into the center of the crib.
Here's a video of ON3P running cores through their planer with a fixed profile crib, check 0:40:
You can see they have a multitude of cribs sitting on the third shelf up as well, different cribs for different cores. My crib differs in the fact that it's adjustable and you can create some pretty dialed and unique profiles with it, and it only requires a swap of the top sheet of MDF for different lengths.
As a sidenote, all of this stuff is out there and you just have to dig a little for it. If you don't have the patience to research you won't have the patience to build.
NinetyFourMy crib differs in the fact that it's adjustable and you can create some pretty dialed and unique profiles with it, and it only requires a swap of the top sheet of MDF for different lengths.
Haven't seen anyone make a crib like that. Mind sharing some details on how you made it?
question, I'm using a router table to profile my ski cores and essentially have exactly what Sammmer built of ski builders if you are familiar with that. Its two long pieces of MDF raised by several small pieces of wood which will determine the dimensions of the core. Although I am unsure what the depth of the router bit should be in order to obtain the right profile. any ideas? (hopefully switching to a planar soon)
momentzquestion, I'm using a router table to profile my ski cores and essentially have exactly what Sammmer built of ski builders if you are familiar with that. Its two long pieces of MDF raised by several small pieces of wood which will determine the dimensions of the core. Although I am unsure what the depth of the router bit should be in order to obtain the right profile. any ideas? (hopefully switching to a planar soon)
Yeah, so you need to do some math, haha, figure out how far past your mdc rails the tip of your bit falls and then you have to lift the rails up that much, it is all like visual math, you need to look at your setup and say "I want the core to be 10mm (or whatever you want) thick in the middle", then set everything up so that the end of the bit is 10mm above the bottom of the core when it is on the rails in the middle. Hopefully that helps some...
momentzquestion, I'm using a router table to profile my ski cores and essentially have exactly what Sammmer built of ski builders if you are familiar with that. Its two long pieces of MDF raised by several small pieces of wood which will determine the dimensions of the core. Although I am unsure what the depth of the router bit should be in order to obtain the right profile. any ideas? (hopefully switching to a planar soon)
I tested that method out and got spot on results. The way I did it was setting up the router crib and router on the MDF runner to sit completely flat on the table. Next step was cutting the blocks to go under MDF, each block was cut to a certain size starting at 12.5mm for the middle and going down to 3mm for tip and tail. After the tip,tail and middle blocks were cut I measured the in-between spots to place more blocks for added support. When all the blocks were set I placed some junk wood down and tested it out. Start off with taking a little off at a time. If you can resaw the wood in half to save time. When you start to get down to the height you want take the router to the flat spot on the MDF and lower the bit completely flat to the table and when you go back to where the runners are lifted due to the blocks you will get your desired height.
cydwhitYeah, so you need to do some math, haha, figure out how far past your mdc rails the tip of your bit falls and then you have to lift the rails up that much, it is all like visual math, you need to look at your setup and say "I want the core to be 10mm (or whatever you want) thick in the middle", then set everything up so that the end of the bit is 10mm above the bottom of the core when it is on the rails in the middle. Hopefully that helps some...
LoafRiderI tested that method out and got spot on results. The way I did it was setting up the router crib and router on the MDF runner to sit completely flat on the table. Next step was cutting the blocks to go under MDF, each block was cut to a certain size starting at 12.5mm for the middle and going down to 3mm for tip and tail. After the tip,tail and middle blocks were cut I measured the in-between spots to place more blocks for added support. When all the blocks were set I placed some junk wood down and tested it out. Start off with taking a little off at a time. If you can resaw the wood in half to save time. When you start to get down to the height you want take the router to the flat spot on the MDF and lower the bit completely flat to the table and when you go back to where the runners are lifted due to the blocks you will get your desired height.
thanks for the help! Correct me if I am wrong but I thought that if I found the correct bit depth for the accurate height of the center of the core, I could keep that setting and run it across the entire board because it would change how deep it cuts into the core because of the varying block heights.
momentzthanks for the help! Correct me if I am wrong but I thought that if I found the correct bit depth for the accurate height of the center of the core, I could keep that setting and run it across the entire board because it would change how deep it cuts into the core because of the varying block heights.
You mean to set the depth once and shape it in one pass? Then in that case yes just find the right height. The way I did it was I took off a little each pass, it takes a little longer but you don't have to worry about a chunk of the core getting ripped out or any other problems. Also it sounds like you are new with using a router and I would suggest taking it slow.
Another helpful tip make sure you use a variable speed router it allows you to start the bit slowly then you can speed it up as you start cutting. Having a 1/5 shank is a big help as well the bit wont flex nearly as much as it would with a 1/4 shank.
Intermission here...
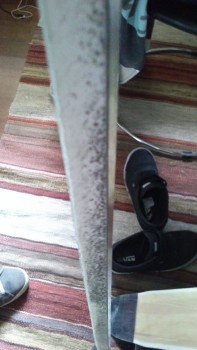
get the first pair with urethane sidewall done, if somebody else is going this route here's my hint: degas the urethane at any cost!
Or you will end up with mixed results as mine.
Two perfectly done
Two with air bubbles
A photo of the finished planks:
(i liked so much 94 and logan skis that i decided to go without graphics this time)
Going to skibuilders to find out something on degassing now.
What are people's thoughts on blizzard's "flip core" tech?
(http://www.blizzard-ski.com/int/technology/flip-core-3d.html)
Also has anybody tried it in a build?
It seems like a reasonable idea in that the core is under less stress and could be less likely to rupture but is this stress (partly) what gives a ski its "lively" feel?
Even without going as far as using a 3D profiled mold and core, would using the planed/machined side face down to reduce the amount the core needs to be deflected in pressing be beneficial?
razors-chazWhat are people's thoughts on blizzard's "flip core" tech?
(http://www.blizzard-ski.com/int/technology/flip-core-3d.html)
Also has anybody tried it in a build?
It seems like a reasonable idea in that the core is under less stress and could be less likely to rupture but is this stress (partly) what gives a ski its "lively" feel?
Even without going as far as using a 3D profiled mold and core, would using the planed/machined side face down to reduce the amount the core needs to be deflected in pressing be beneficial?
It was either in the comments of the Blister review or a thread on SB, but Scott wanted to press two pairs that were the same in every way expect the core orientation. I don't believed he ever followed through.
Would be a worthy thing to test from both a performance and construction standpoint, skiing em back to back!
PudgeIt was either in the comments of the Blister review or a thread on SB, but Scott wanted to press two pairs that were the same in every way expect the core orientation. I don't believed he ever followed through.
Would be a worthy thing to test from both a performance and construction standpoint, skiing em back to back!
We tested flipcores on some Caylors and Jeronimos. While the flip cores were skiable and certainly fun, the traditional core was a far better performer. More stable, better edge grip, more responsive. Basically exactly what we would expect. If we were actually going to design a flip core, I am sure we would take a different approach than literally just flipping the core, because there was a definitely decrease in performance with that design, but we are happy with how we are currently designing and building our cores.
Personally, I would not waste my time with any flip core stuff. Just my take at least.
iggyskierWe tested flipcores on some Caylors and Jeronimos. While the flip cores were skiable and certainly fun, the traditional core was a far better performer. More stable, better edge grip, more responsive. Basically exactly what we would expect. If we were actually going to design a flip core, I am sure we would take a different approach than literally just flipping the core, because there was a definitely decrease in performance with that design, but we are happy with how we are currently designing and building our cores.
Personally, I would not waste my time with any flip core stuff. Just my take at least.
It's interesting what your saying about what you found from a flip core because those things are pretty much the selling points from blizzard on the topic, does this mean a)blizzard are lying, b)its more to do with the 3D cutting than the action of flipping c)the way you did it for the caylors and geronimos wasn't suitable or comparable to the way blizzard do it?
razors-chazIt's interesting what your saying about what you found from a flip core because those things are pretty much the selling points from blizzard on the topic, does this mean a)blizzard are lying, b)its more to do with the 3D cutting than the action of flipping c)the way you did it for the caylors and geronimos wasn't suitable or comparable to the way blizzard do it?
My guess is b & c. We literally took the same stock core we use for the Jmo & Caylor, flipped it upside down, and laid up the ski. I know I've seen some Blizzard advertising that makes it seem that simple, but I highly doubt it is. There has to be more to it than just flipping the core upside (which is fine and what I would expect, just saying...).
By no means did our flipcore tests ski bad, but it wasn't close to the same performance we get out of the stock layup. In powder, they float great, but anything that wasn't totally soft there was no question the stock layup was better.
My guess is that there is a lot more design that goes into the flipcore than just flipping the original core profile upside down, at least I hope so. So if you want to try some stuff out with a flipcore design, go for it. I'm just saying I would do more than just flip the core over.
**This post was edited on Jun 25th 2014 at 3:26:02pm
I'm no pro skibuilder like iggyskier but I've also tryed to do the flipcore layup, whit a difference: I've done it in cambered skis hoping that "tensioning" the core into the final shape would give better pop.
the core where full bamboo, but in the end the difference was negligible, I guess in blizzard isn't only a matter of core orientation...
but I guess the best thing is probably try and get your conclusion, it's what building skis is all about, trying.(at least for me)
That's awesome Scott! Didn't know you guys gave it a try, probably should've looked elsewhere than just he comments of that review (;
I don't know if anyone ever cares about my excuses, buuuuuuuuuut ever since spring I have gotten way into surfing. Trying to make it a year round pursuit has for sure cut down on my funds for my press. Meaning they are all gone.
Oops!
But now at school I can surf all week and ski all weekend :D
PudgeI don't know if anyone ever cares about my excuses
QFE! I work full time and I think this is the busiest we've ever been. Between that and a few other things with family life, I just haven't had time to build, or write, or do a few other things. My good chunks of time usually coincide with some of the local XC MTB rides so I'm usually out there trying to stay in shape when I get the chance.
When things slow down some, I will absolutely be back building; I have a wealth of fresh materials, and some newer tooling I've built through the spring to speed up my process. So once I get after it, it should be fairly smooth sailing!
Everyone else's work is looking top notch, keep it up! It gets me stoked to get back at it.
i never thought i would be saying this but i wish the vancouver schools had not gone on strike so that i could get back in my woodshop and keep building
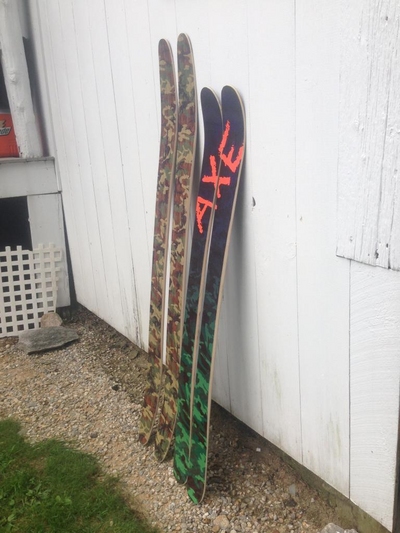
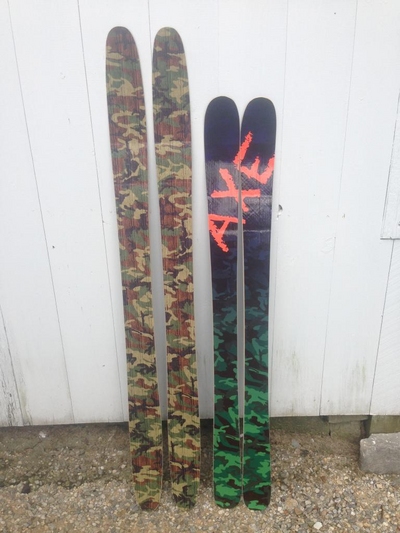
Sorry, I haven't really been around in the thread for a bit, but I have been getting after some building this summer. I was going to do a big dump at the end, but it seems like some of the more active builders are on hiatus, so I'm gonna post some homemade ski porn so we can all get our fix.
two new pairs:
165 length. 120-91-113
184 length. 126-110-126
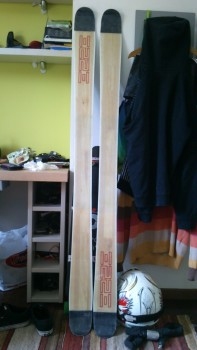
I know the camo is reminiscent of a jskis graphic, but this topsheet was actually designed before I saw those. the "axe" graphic is just some fooling around with branding (not really digging it, ultimately reminded me of axe body spray too much), more for myself than anything. I think ninetyfour did something similar, but not nearly as conspicuous haha.
now the good stuff
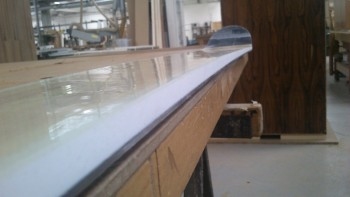
really happy how these came out. first pairs with routed bevelled sidewalls, so hopefully that helps with some topsheet chipping issues i've had before.
I'll try to have a more comprehensive dump at a later time, with more pictures of the entire process and a bunch of new pairs. If anyone has any questions for me in the meantime, I'm more likely to see PMs than replies to the thread.
Just thought I would post to say that having got materials delivered and plans finalising I'm going to be moving pretty quick on a new build so you should be seeing some updates, which will hopefully encourage some of you others to get back into things as i love to see the ideas and approaches other people have.
Find the time to getting back into building.
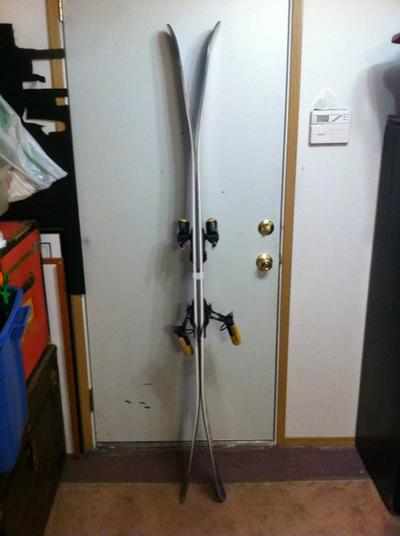
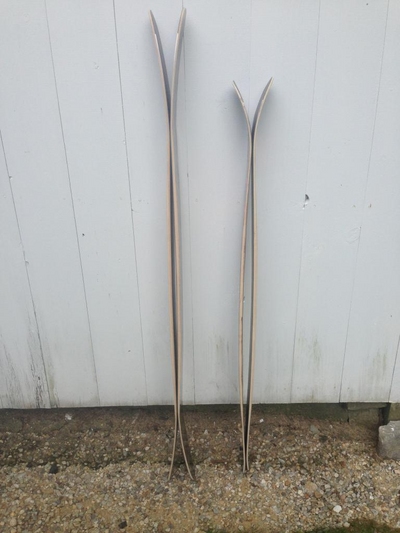
These are the new pow skis I've made (187cm, 122 waist, full rocker)
The central strip in the core is something called d220 and it's basically the material used in the Magnum opus or in the faction candide,we'll see how this stuff works. The outer core is ash and the other materials are just standard.
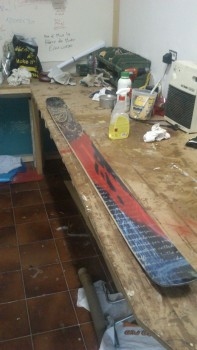
Here's a finished skis ( They're so wide that I'm force to press a single ski..)
If anyone is interest, we have some left over Bcomp material we aren't going to be using anymore, so if anyone wants to pick it up without having to pay out the ass for to have it shipped from europe, let me know.
Or if you use wood or urethane sidewall you can make a little hole in the core and use a nail hammered in your mold.
Logan, performancewise I can't tell you how this core performs but I've tried the lighter one (the d100) and that was more tailored to tour skis... Hope this is better for powder skis