A quick word on blocking ads
It looks like you are using an ad blocker. That's okay. Who doesn't? But without advertising revenue, we can't keep making this site awesome. Click the link below for instructions on disabling adblock.
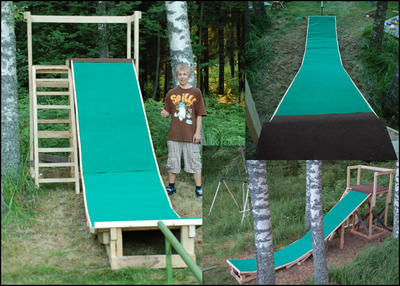
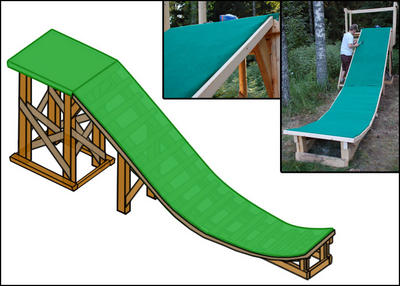
This is a tutorial based on how me, my dad and brother built my summer setup:
What you need to know and have:
Build time: 12-16h
Price to build: About 70€ ($100)
Amount of wood used: About 85 meters (280ft), without the stairs about 60 meters (200ft)
Tools used: Hammer, nails, saw (preferably circular saw), tape measure, marker, rope, scissors.
Materials used: - 5x10cm (2 x 4inch) planks
- Some 2x10cm (0.8 x 4inch) planks
- About 13.5 meters of 2x5cm (0.8 x 2inch) planks
- Turf
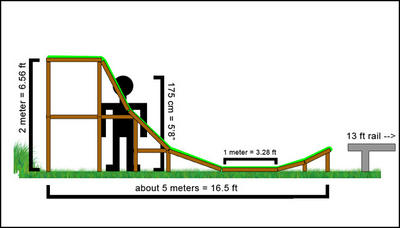
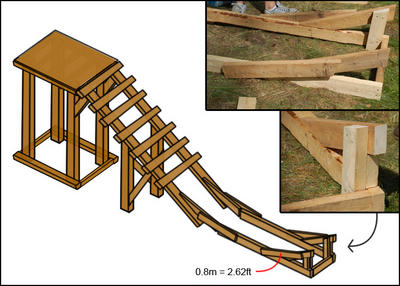
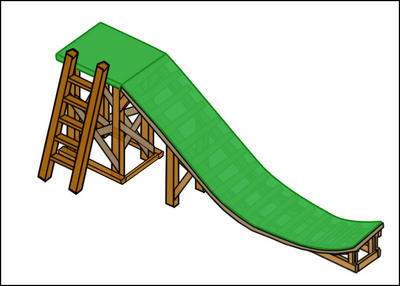
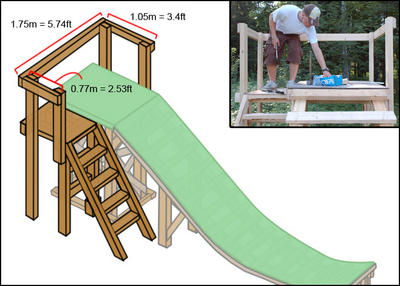
Blueprint:
This is the blueprint I made so that I would have an idea on how I wanted my setup to be:
A summer setup
Miss the winter and the slopes, and want to keep up you skills during summer? If you want to have a summer setup you need to have a drop-in so you can get some speed, and a rail.
Building the drop-in:
Step 1:
Start with making a drop-in tower like this with 5x10cm (2 x 4inch) thick planks:
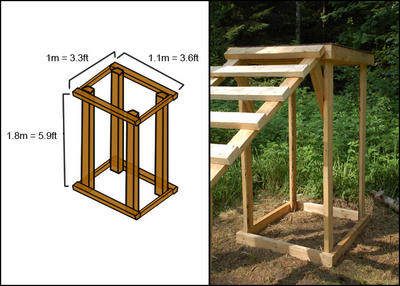
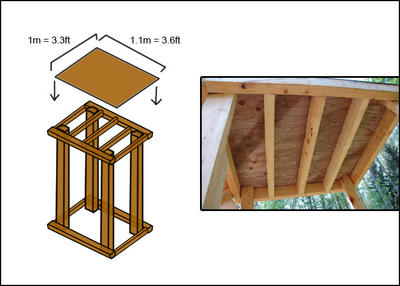
Step 2:
Now when you have made that, put 3 planks on the top in the middle and then put a 1 x 1.10 meter plywood piece on top.
Step 3:
Now it’s time to start making the ramp for the drop-in. Put two 3.6 meter long planks the same way as in the picture below.
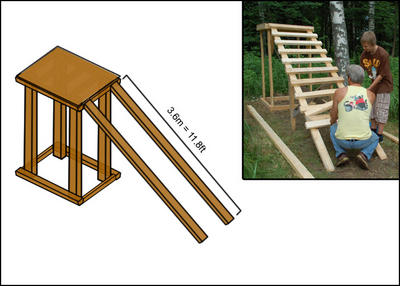
Step 4:
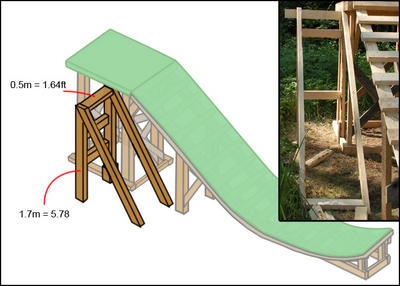
Now when you have done that you need to make a support for the ramp.
Step 5:
Now you’re going to make the transition for the ramp and start putting some planks on top of it.
Step 6:
Now when you have made the transition and started putting the planks on your going to start making the jump.
Step 7:
Now we need a transition so the jump is smooth, and remember the support for the jump.
Step 8:
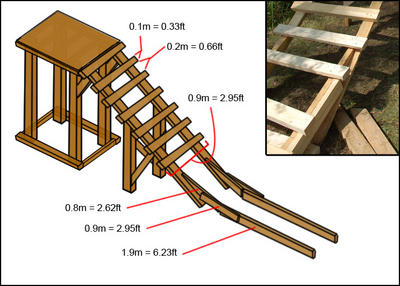
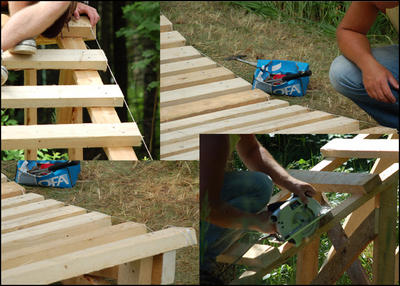
Now when you have done that you can put planks all the way down. NOTE that you need to put the planks closer to each other in the curve so that your skis won’t get caught when your going down (see the picture below).

Step 9:
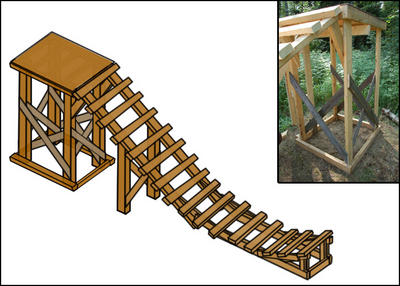
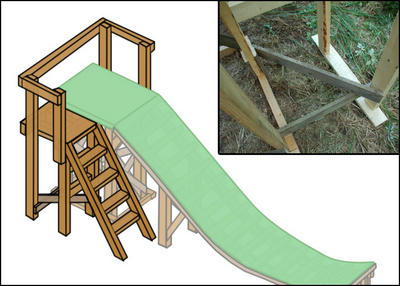
Now you need to make some supports for the tower so that it won’t fall apart.
Step 10:
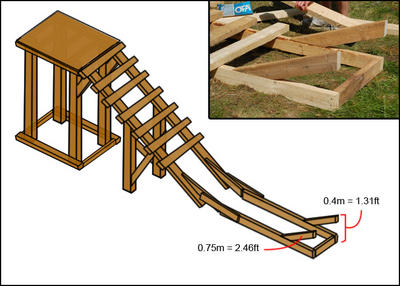
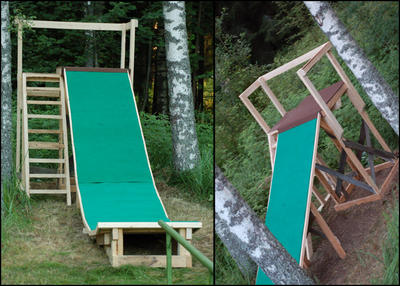
Now when you have made all that you’re going to cut the sides of the ramp, to get them straight. Tie a rope on the top of the ramp as seen below and then tie it on the last plank down the ramp, and make sure the rope is straight. When you have done that draw a line with a marker down the ramp where the rope is and then just cut the sides with a saw or electric saw.
Step 11:
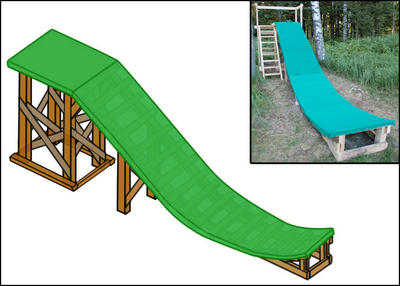
Now put on the turf (or what ever you want to use) on your drop-in. Make sure you make it tight so it won’t wrinkle.
Step 12:
Now you’re almost finished with your new drop-in! Fasten some thin planks on the side of the ramp as seen on the picture below to make it look better, and support the turf. (This step isn’t necessary)
Now you are ready with your drop-in! But now you need to make something so that you can get up on it.
The summer setup ladder/stair:
Now when you have built a drop-in you need a ladder or stairs so you can get up on it, you can build a simple ladder like this:
I won’t give any further instructions on how to build a ladder like this, as it’s pretty simple and because I haven’t built one myself for my setup. But as you can see on the picture above you only need 2 thick planks and some smaller ones between them. This should give you a pretty good basic ladder to get up with.
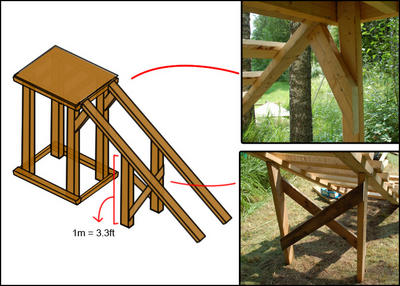
Or then you can build some nice stairs as I did that have handlebars and some extra space on the top to chill on. (Note that if you decide to make stairs like this on your setup you don’t need to build the X support on the left or right side on the drop-in tower, depending on which side you want the stairs to be on, so that there’s some room for the stair support. We decided to make the stairs on the left side, as you can see on the pictures below.
Step 1:
Put a plank under the drop-in tower (as seen it the picture below) and make some supports on the side of it, then put a angled plank that is the start of your new stairs.

Step 2:
Now make the other side of the stairs and put some supportive planks between them.
Step 3:
Put a 1.6 meter plank under the right side of the drop-in tower that goes all the way to the left side of the stairs (as in the picture below). Then make the stairs, we used a 20cm (0.66ft) long plank as measurement on how far apart the stairs should be, and the stairs themselves are 0.5m wide. Make sure you fasten the stairs thoroughly, so they are safe to walk on.

Step 4:
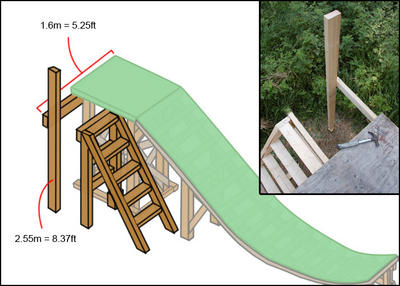
Next you’ll put a 1.6 meter long plank that goes all the way from the right side of the drop-in tower to the left side of the stair, after that put a 2.55 meter long plank straight up as in the picture.
Step 5:
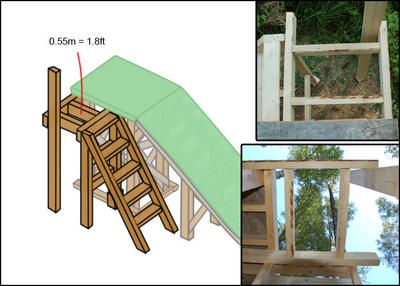
Now when you have done that it’s time to start making the top floor. Put a couple of supportive planks between the two main planks, as seen in the picture.
Step 6:
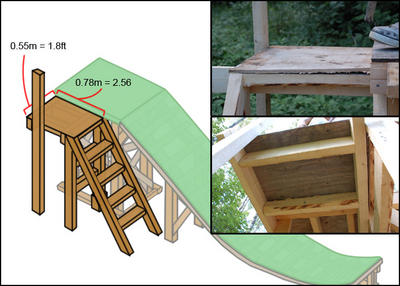
Nail a piece of plywood on top.
Step 7:
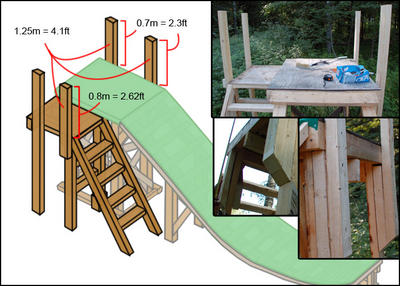
Now we’ll make the handle bar, as seen in the pictures. Make sure you fasten them thoroughly, so they are safe to
lean on.
Step 8:
Finish the handle bar by fastening the horizontal planks, fasten them thoroughly!
Step 9:
Time to make some supports for the stairs.
Step 10:
Now put some turf on top and you’re ready!

That’s it! Now you’re pretty much ready with your new summer setup. Enjoy your summer skiing